2D Actuators

Setup guidance and the complete actuator reference organized exactly like the 2D right-click menu.

◷ 38 min read Phase 5 enhanced
Guidance panels
Source of truth This page lists only bricks registered by the uploaded addon. Legacy aliases and compatibility script shims are not presented as separate menu entries.
Chapter guide

Building 2D actions

These actuators are grouped exactly like the 2D right-click menu and use 2D node types and Vector2-based values where appropriate.

  1. Select a supported 2D node.
  2. Choose the matching right-click submenu.
  3. Verify the target node and coordinate values before adding more logic.
2D WORKFLOW

2D Setup and Actuators

Use this section for Node2D-based scenes. The documentation categories below mirror the actuator submenus displayed when a supported 2D node is selected.

1

Select a 2D node

Select a Node2D, CharacterBody2D, RigidBody2D, Camera2D, AnimatedSprite2D, or another supported 2D node.

2

Open Logic Bricks

The editor switches to the 2D brick domain and shows common bricks together with compatible 2D-specific bricks.

3

Use 2D values

Position and movement use Vector2 values. Rotation is expressed around the 2D axis, and 2D camera actions target Camera2D nodes.

4

Choose by submenu

Use the category links below to jump to the same submenu organization used by the right-click menu.

How this relates to the menu

The 2D menu substitutes its own Sprite Animation and Tween Animation bricks for incompatible generic animation entries.

RIGHT-CLICK SUBMENU

Animation

Right-click → Actuators → Animation

actuator • 2d

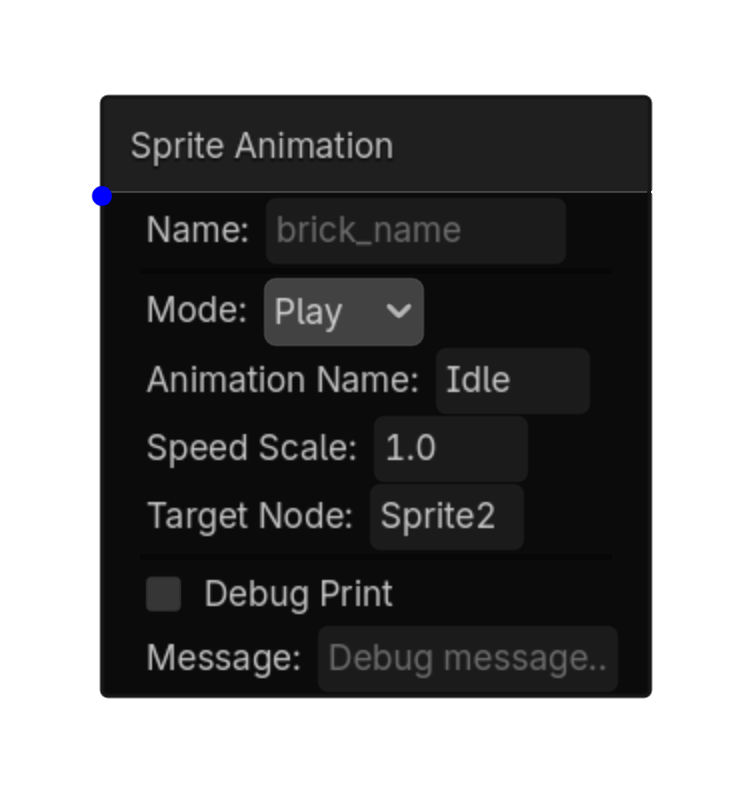
Sprite Animation

2D

Play, stop, or pause AnimatedSprite2D animations.

Menu Add Logic Brick → Actuators → Animation
Source actuators/2d/sprite_animation_2d_actuator.gd

Options

Property Details
mode Mode
Choices: Play,Stop,Pause
Default: play
animation_name Animation Name
speed_scale Speed Scale
Default: 1.0
target_node Target Node
Using this brick

Typical uses

  • Perform the animation action described above after a sensor / controller chain succeeds.
  • Reuse the brick in multiple states or chains with different option values.
  • Target a specific node by configuring the node field before testing the chain.

Example chain

Choose a sensor Controller Sprite Animation
Tip Confirm the target node name and node type before troubleshooting the rest of the chain.
Common mistake A continuously active sensor may run this actuator every frame. Use a one-shot condition when the action should happen only once.
Sprite Animation screenshot placeholder
Sprite Animation screenshot
actuator • 2d

Tween

2D

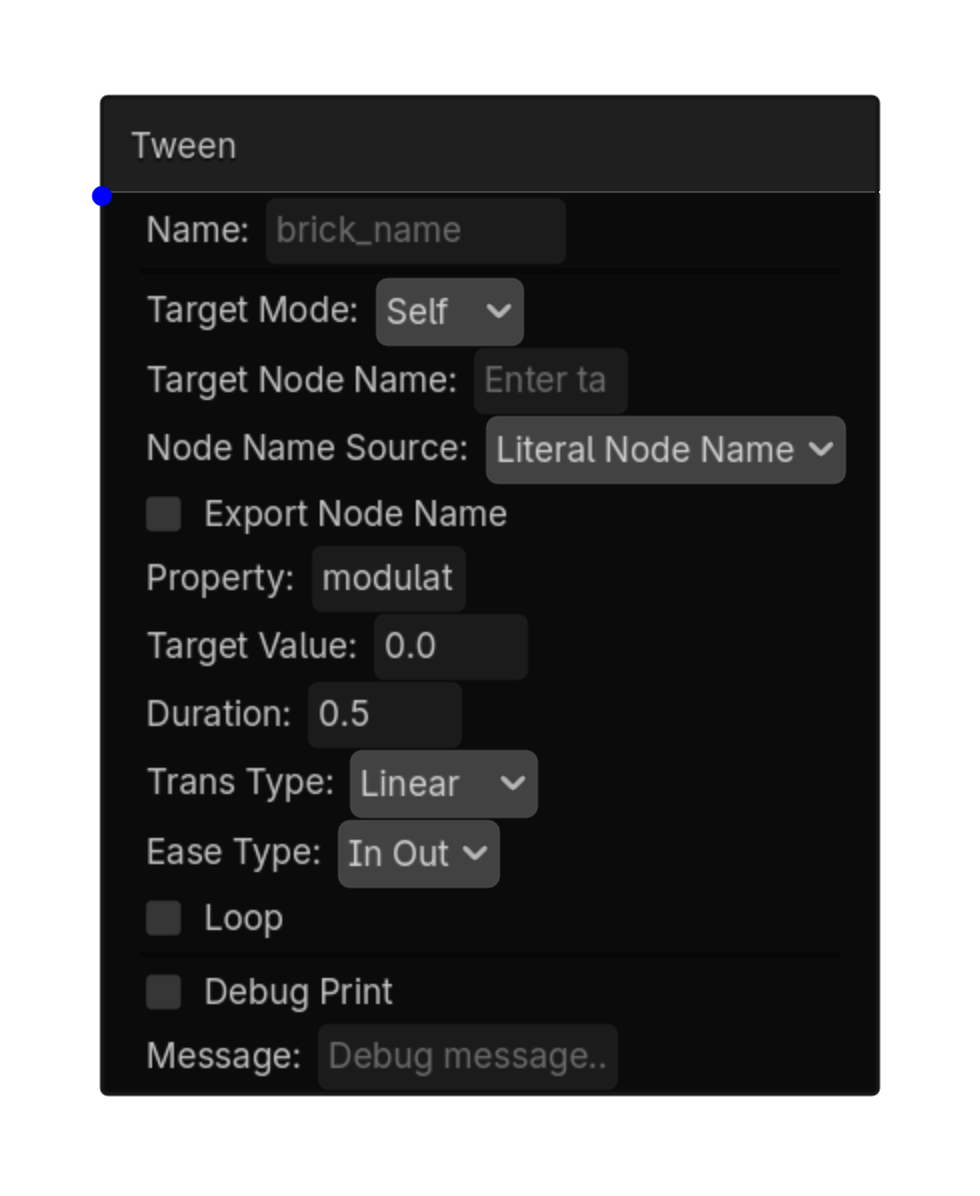
Smoothly changes a 2D property such as position, rotation, scale, or modulate over time.

Menu Add Logic Brick → Actuators → Animation
Source actuators/2d/tween_animation_2d_actuator.gd

This brick exposes no configurable properties.
Using this brick

Typical uses

  • Perform the animation action described above after a sensor/controller chain succeeds.
  • Reuse the brick in multiple states or chains with different option values.
  • Pair it with an appropriate sensor to control when the action occurs.

Example chain

Choose a sensor Controller Tween
Tip Test the actuator with the simplest possible sensor first, then add variables, timing, or additional conditions.
Common mistake A continuously active sensor may run this actuator every frame. Use a one-shot condition when the action should happen only once.
Tween actuator screenshot
Tween screenshot
RIGHT-CLICK SUBMENU

Audio

Right-click → Actuators → Audio

actuator • shared

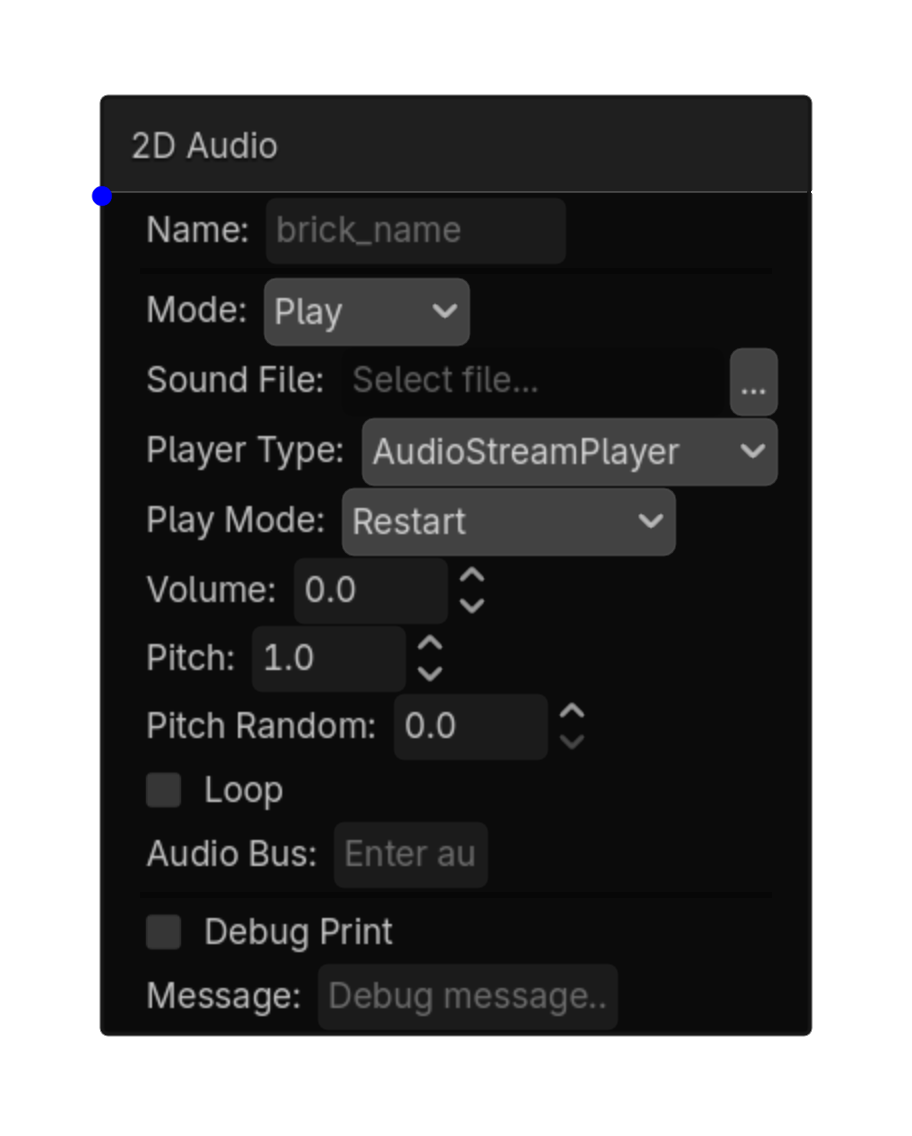
2D Audio

2D

Play 2D or UI audio from a file.

Menu Add Logic Brick → Actuators → Audio
Source actuators/common/audio_2d_actuator.gd

Options

Property Details
mode Mode
Choices: Play,Stop,Pause,Fade In,Fade Out
Default: play
sound_file Sound File
Choices: *.wav,*.ogg,*.mp3
player_type Player Type
Choices: AudioStreamPlayer,AudioStreamPlayer2D
Default: stream_player
play_mode Play Mode
Choices: Restart,Overlap,Ignore If Playing
Default: restart
volume Volume
Choices: -80,24,0.1
Default: 0.0
pitch Pitch
Choices: 0.01,4.0,0.01
Default: 1.0
pitch_random Pitch Random
Choices: 0.0,1.0,0.01
Default: 0.0
loop Loop
Default: false
audio_bus Audio Bus
fade_duration Fade Duration
Choices: 0.1,10.0,0.1
Default: 1.0
Using this brick

Typical uses

  • Perform the audio action described above after a sensor/controller chain succeeds.
  • Reuse the brick in multiple states or chains with different option values.
  • Pair it with an appropriate sensor to control when the action occurs.

Example chain

Choose a sensor Controller 2D Audio
Tip Test the actuator with the simplest possible sensor first, then add variables, timing, or additional conditions.
Common mistake A continuously active sensor may run this actuator every frame. Use a one-shot condition when the action should happen only once.
2D Audio screenshot placeholder
2D Audio screenshot
actuator • shared

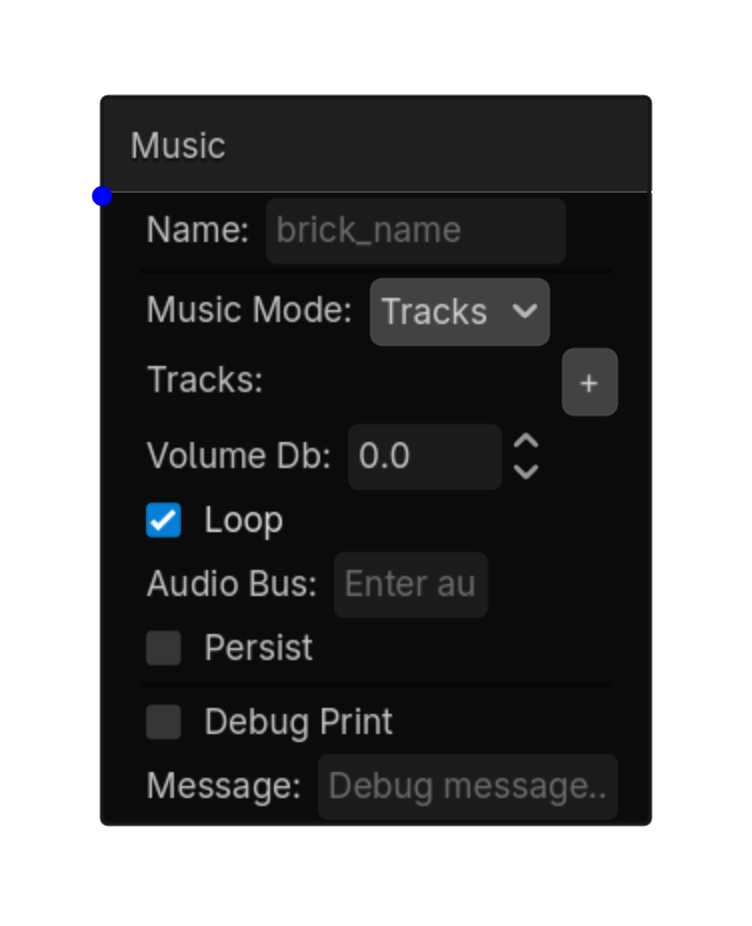
Music

2D

Three modes:\nTracks: define and create music players at startup.\nSet: set which track is current (and optionally play it).\nControl: play, stop, pause, resume, or crossfade from current to another track.

Menu Add Logic Brick → Actuators → Audio
Source actuators/common/music_actuator.gd

Options

Property Details
music_mode Music Mode
Choices: Tracks,Set,Control
Default: tracks
tracks Tracks
Default: []
volume_db Volume Db
Choices: -80,24,0.1
Default: 0.0
loop Loop
Default: true
audio_bus Audio Bus
persist Persist
Default: false
set_track Set Track
Default: 0
set_play Set Play
Default: true
control_action Control Action
Choices: Play,Stop,Pause,Resume,Crossfade
Default: play
to_track To Track
Default: 1
crossfade_time Crossfade Time
Choices: 0.1,10.0,0.1
Default: 1.0
Using this brick

Typical uses

  • Perform the general action described above after a sensor/controller chain succeeds.
  • Reuse the brick in multiple states or chains with different option values.
  • Pair it with an appropriate sensor to control when the action occurs.

Example chain

Choose a sensor Controller Music
Tip Test the actuator with the simplest possible sensor first, then add variables, timing, or additional conditions.
Common mistake A continuously active sensor may run this actuator every frame. Use a one-shot condition when the action should happen only once.
Music screenshot placeholder
Music screenshot
RIGHT-CLICK SUBMENU

Camera

Right-click → Actuators → Camera

actuator • 2d

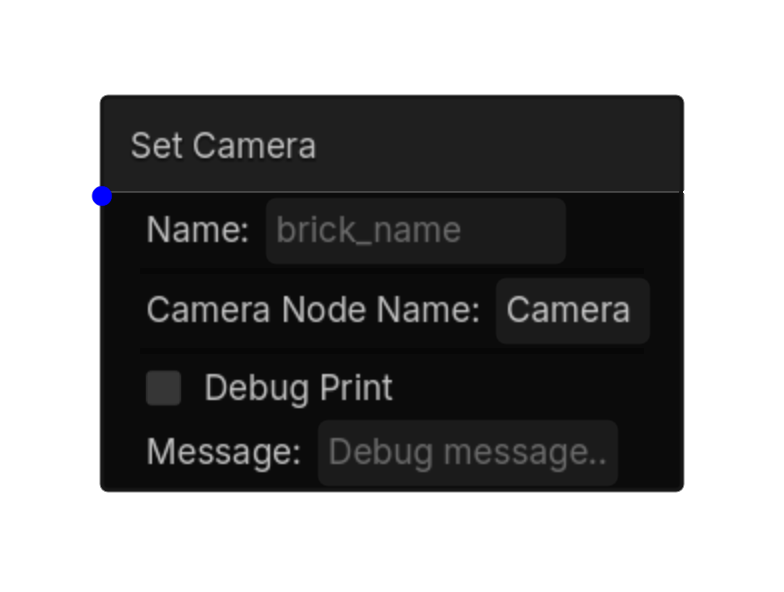
Set Camera

2D

Makes the assigned Camera3D the active camera.\nUse a one-shot sensor (e.g. Delay or a state transition) to avoid\ncalling make_current() every frame unnecessarily.\n\n⚠ Adds an @export in the Inspector — assign your Camera3D there.

Menu Add Logic Brick → Actuators → Camera
Source actuators/3d/set_camera_actuator.gd

Options

Property Details
camera_node_name Camera Node Name
Default: Camera3D
Camera3D node name
Using this brick

Typical uses

  • Perform the general action described above after a sensor/controller chain succeeds.
  • Reuse the brick in multiple states or chains with different option values.
  • Target a specific node by configuring the node field before testing the chain.

Example chain

Choose a sensor Controller Set Camera
Tip Confirm the target node name and node type before troubleshooting the rest of the chain.
Common mistake A continuously active sensor may run this actuator every frame. Use a one-shot condition when the action should happen only once.
Set Camera screenshot placeholder
Set Camera screenshot
actuator • 2d

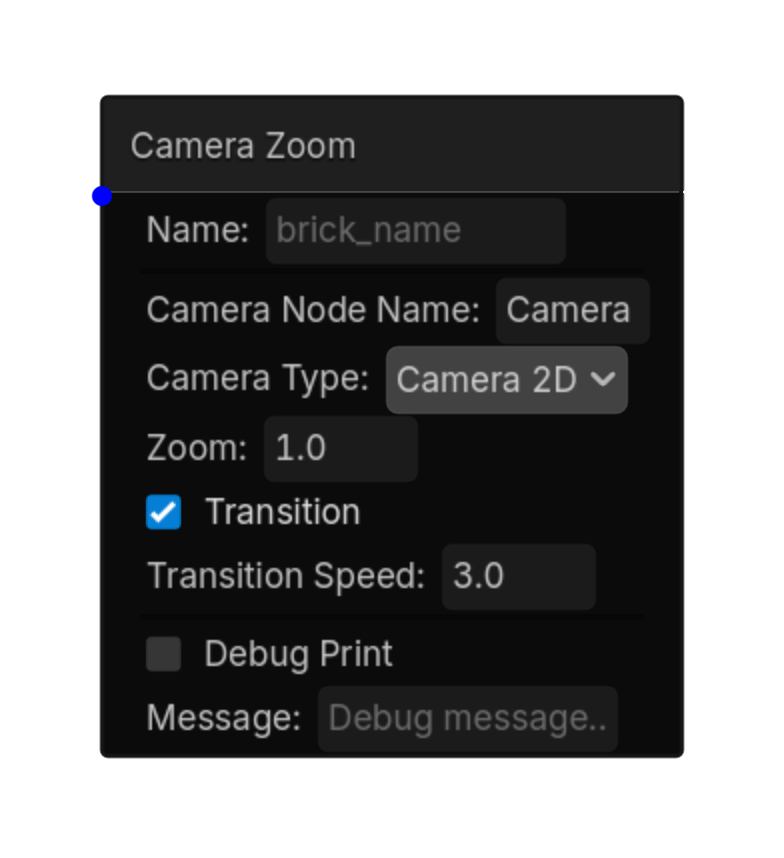
Camera Zoom

2D

Changes camera FOV (3D) or zoom (2D).\nDrag your camera into the inspector slot.

Menu Add Logic Brick → Actuators → Camera
Source actuators/3d/camera_zoom_actuator.gd

Options

Property Details
camera_node_name Camera Node Name
Default: Camera3D
Camera3D or Camera2D node name
camera_type Camera Type
Choices: Camera 3D,Camera 2D
Default: camera_3d
fov Fov
Default: 75.0
zoom Zoom
Default: 1.0
transition Transition
Default: true
transition_speed Transition Speed
Default: 3.0
Using this brick

Typical uses

  • Perform the general action described above after a sensor/controller chain succeeds.
  • Reuse the brick in multiple states or chains with different option values.
  • Target a specific node by configuring the node field before testing the chain.

Example chain

Choose a sensor Controller Camera Zoom
Tip Confirm the target node name and node type before troubleshooting the rest of the chain.
Common mistake Timing options change how long the action takes; avoid retriggering the same transition every frame unless that behavior is intentional.
Camera Zoom screenshot placeholder
Camera Zoom screenshot
actuator • 2d

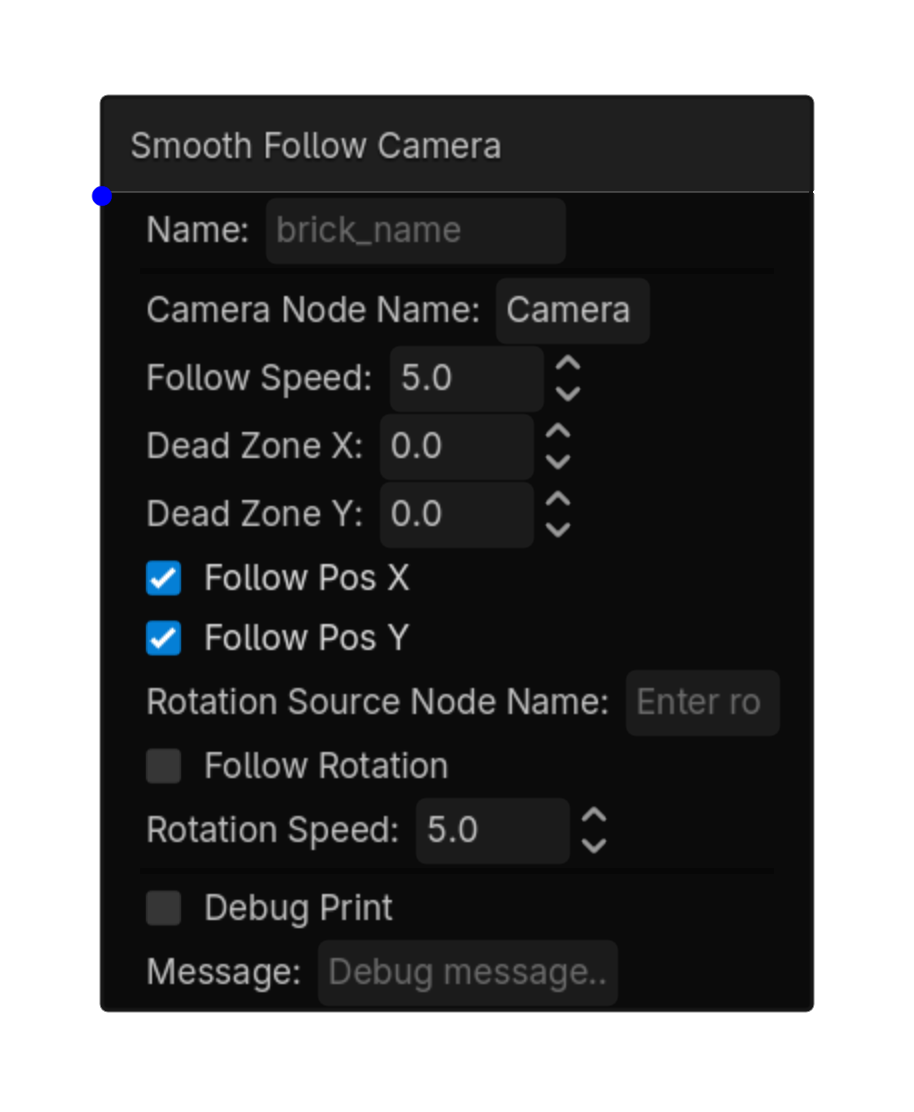
Smooth Follow Camera

2D

Smoothly follows this node with the assigned Camera3D,\nmaintaining the camera's initial offset from the target.\n\nPosition follow: camera tracks the node's position per axis.\nRotation follow: camera orbits the node, keeping it in frame.\nDead zone: camera only moves once the node exceeds the threshold.\n\n⚠ Adds an @export in the Inspector — assign your Camera3D there.

Menu Add Logic Brick → Actuators → Camera
Source actuators/3d/smooth_follow_camera_actuator.gd

Options

Property Details
camera_node_name Camera Node Name
Default: Camera3D
Camera3D node name
follow_speed Follow Speed
Default: 5.0
dead_zone_x Dead Zone X
Default: 0.0
dead_zone_y Dead Zone Y
Default: 0.0
dead_zone_z Dead Zone Z
Default: 0.0
follow_pos_x Follow Pos X
Default: true
follow_pos_y Follow Pos Y
Default: true
follow_pos_z Follow Pos Z
Default: true
rotation_source_node_name Rotation Source Node Name
Rotation source node name (blank = self)
follow_rot_x Follow Rot X
Default: false
follow_rot_y Follow Rot Y
Default: false
follow_rot_z Follow Rot Z
Default: false
rotation_speed Rotation Speed
Default: 5.0
Using this brick

Typical uses

  • Perform the general action described above after a sensor/controller chain succeeds.
  • Reuse the brick in multiple states or chains with different option values.
  • Target a specific node by configuring the node field before testing the chain.

Example chain

Choose a sensor Controller Smooth Follow Camera
Tip Confirm the target node name and node type before troubleshooting the rest of the chain.
Common mistake A continuously active sensor may run this actuator every frame. Use a one-shot condition when the action should happen only once.
Smooth Follow Camera screenshot placeholder
Smooth Follow Camera screenshot
actuator • 2d

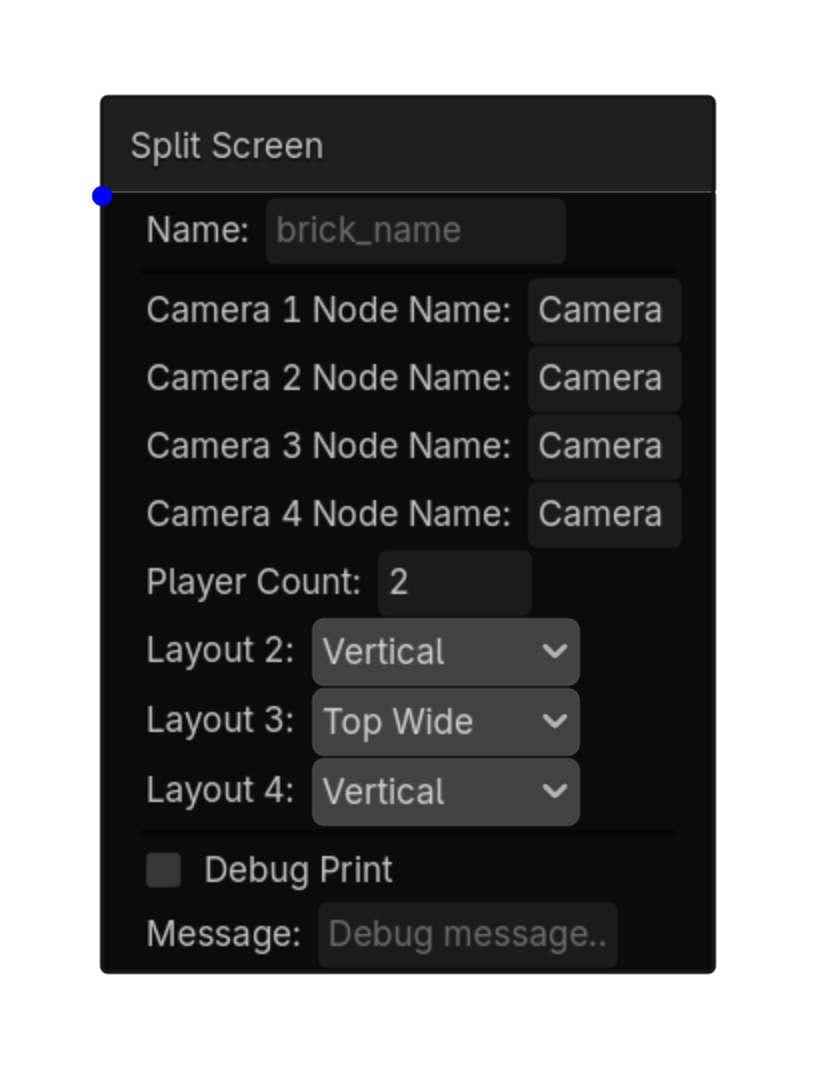
Split Screen

2D

Creates a two-player 2D split-screen view using two Camera2D nodes and isolated SubViewports.

MenuAdd Logic Brick → Actuators → Camera
Sourceactuators/2d/split_screen_2d_actuator.gd

Options

PropertyDetails
camera_1_node_nameFirst Camera2D node name. Default: Camera2D
camera_2_node_nameSecond Camera2D node name. Default: Camera2D2
layoutScreen division: Vertical or Horizontal. Default: Vertical
Using this brick

Typical uses

  • Run Split Screen after a sensor and controller chain succeeds.
  • Combine it with states to enable the behavior only during the appropriate gameplay mode.

Example chain

SensorControllerSplit Screen
TipBoth camera names must resolve to Camera2D nodes in the active scene.
Common mistakeDo not place the split-screen display on a canvas layer rendered by its own SubViewports; the actuator excludes its display layer automatically.
Split Screen actuator screenshot
Split Screen screenshot
RIGHT-CLICK SUBMENU

Game

Right-click → Actuators → Game

actuator • shared

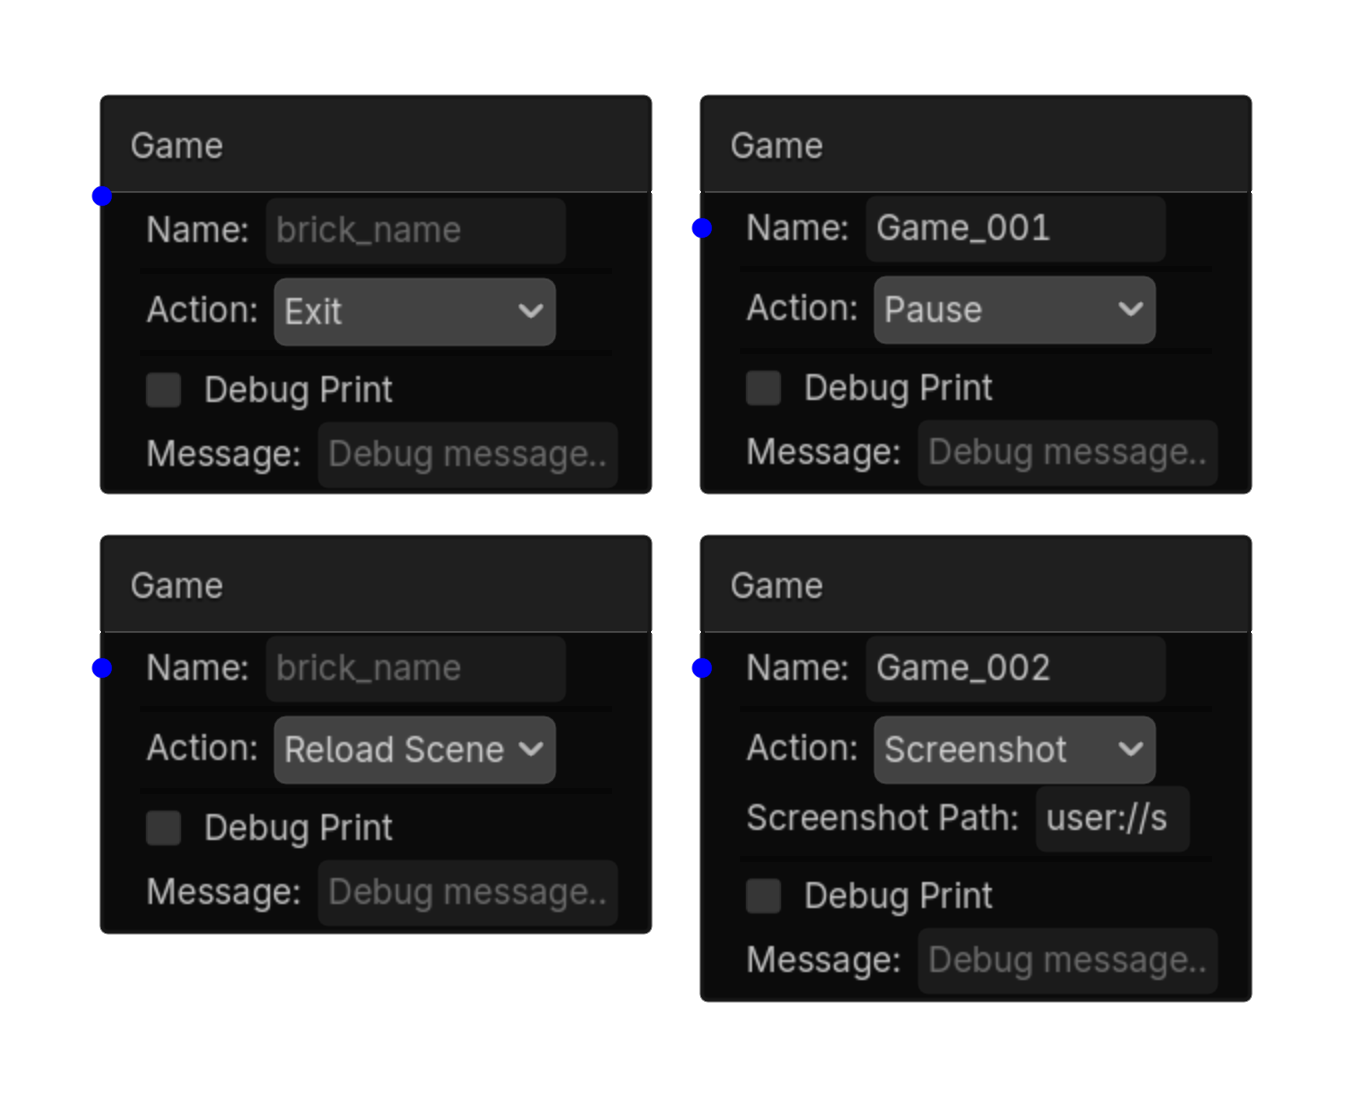
Game

2D

Exit, restart, pause, and screenshot functionality

Menu Add Logic Brick → Actuators → Game
Source actuators/common/game_actuator.gd

Options

Property Details
action Action
Choices: Exit,Reload Scene,Pause,Screenshot
Default: exit
screenshot_path Screenshot Path
Default: user://screenshot.png
Using this brick

Typical uses

  • Perform the general action described above after a sensor/controller chain succeeds.
  • Reuse the brick in multiple states or chains with different option values.
  • Pair it with an appropriate sensor to control when the action occurs.

Example chain

Choose a sensor Controller Game
Tip Test the actuator with the simplest possible sensor first, then add variables, timing, or additional conditions.
Common mistake A continuously active sensor may run this actuator every frame. Use a one-shot condition when the action should happen only once.
Game screenshot placeholder
Game screenshot
actuator • shared

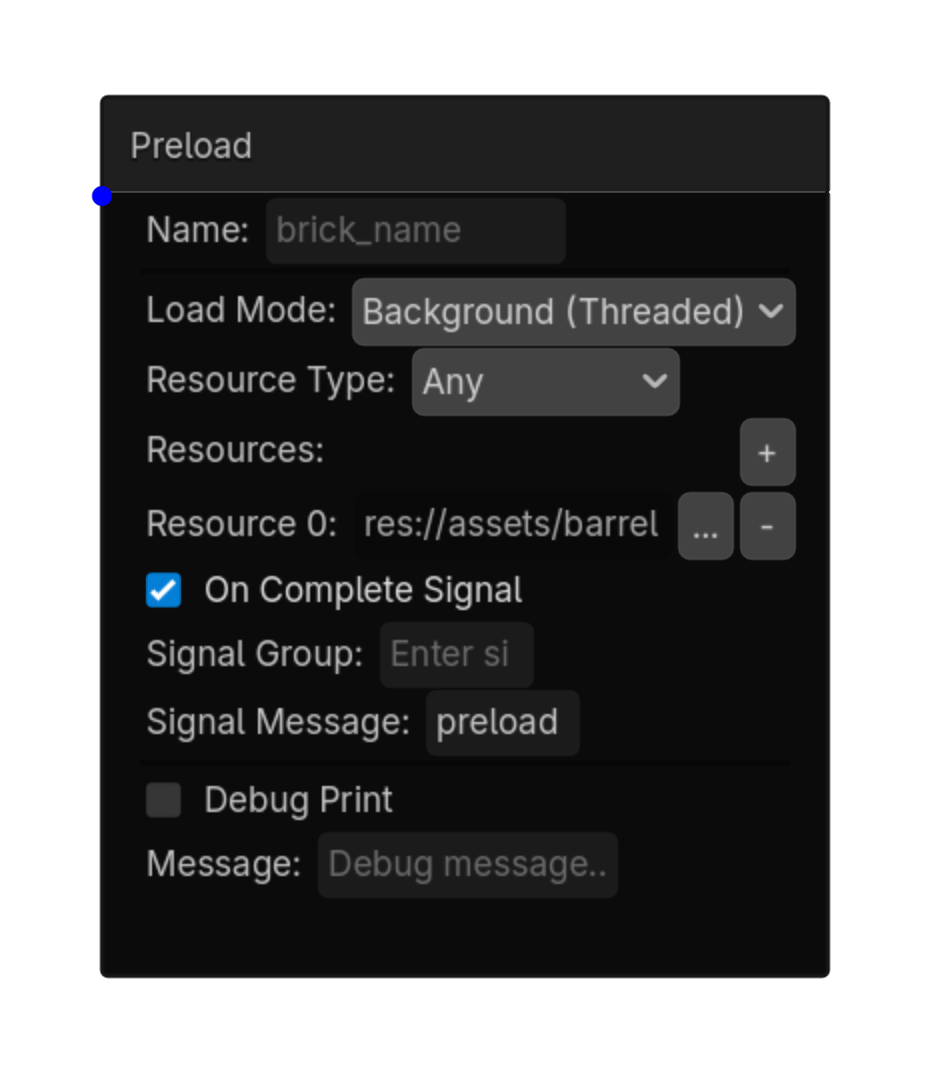
Preload

2D

Preloads resources (materials, scenes, textures, audio, meshes) into memory before they are needed, preventing runtime hitches and frame drops.

Menu Add Logic Brick → Actuators → Game
Source actuators/common/preload_actuator.gd

Options

Property Details
load_mode Load Mode
Choices: Background (Threaded),Immediate (Blocking)
Default: background
resource_type Resource Type
Choices: Any,Scene,Material,Texture,AudioStream,Mesh,Shader
Default: Any
resources Resources
Default: []
on_complete_signal On Complete Signal
Default: true
signal_group Signal Group
signal_message Signal Message
Default: preload_done
Using this brick

Typical uses

  • Perform the general action described above after a sensor/controller chain succeeds.
  • Reuse the brick in multiple states or chains with different option values.
  • Pair it with an appropriate sensor to control when the action occurs.

Example chain

Choose a sensor Controller Preload
Tip Test the actuator with the simplest possible sensor first, then add variables, timing, or additional conditions.
Common mistake A continuously active sensor may run this actuator every frame. Use a one-shot condition when the action should happen only once.
Preload screenshot placeholder
Preload screenshot
actuator • shared

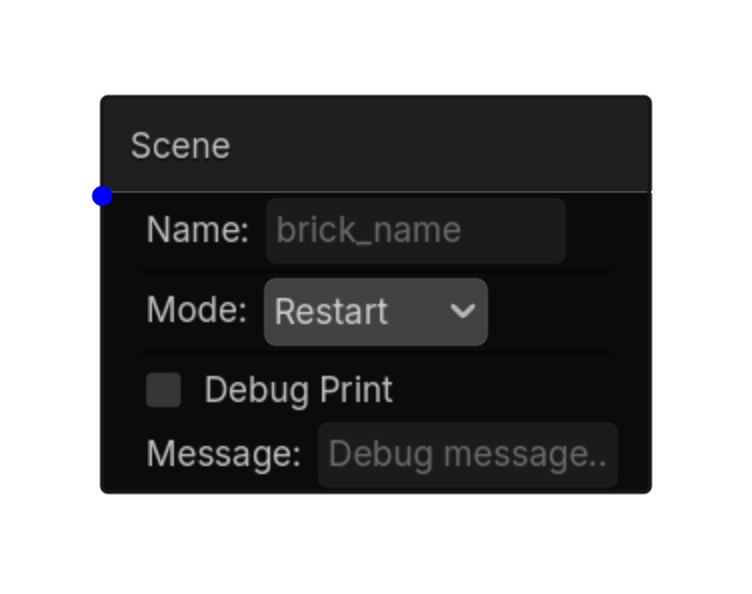
Scene

2D

Similar to UPBGE's Scene actuator

Menu Add Logic Brick → Actuators → Game
Source actuators/common/scene_actuator.gd

Options

Property Details
mode Mode
Choices: Restart,Set Scene
Default: restart
scene_path Scene Path
Choices: *.tscn,*.scn
Using this brick

Typical uses

  • Perform the general action described above after a sensor/controller chain succeeds.
  • Reuse the brick in multiple states or chains with different option values.
  • Pair it with an appropriate sensor to control when the action occurs.

Example chain

Choose a sensor Controller Scene
Tip Test the actuator with the simplest possible sensor first, then add variables, timing, or additional conditions.
Common mistake A continuously active sensor may run this actuator every frame. Use a one-shot condition when the action should happen only once.
Scene screenshot placeholder
Scene screenshot
actuator • 2d

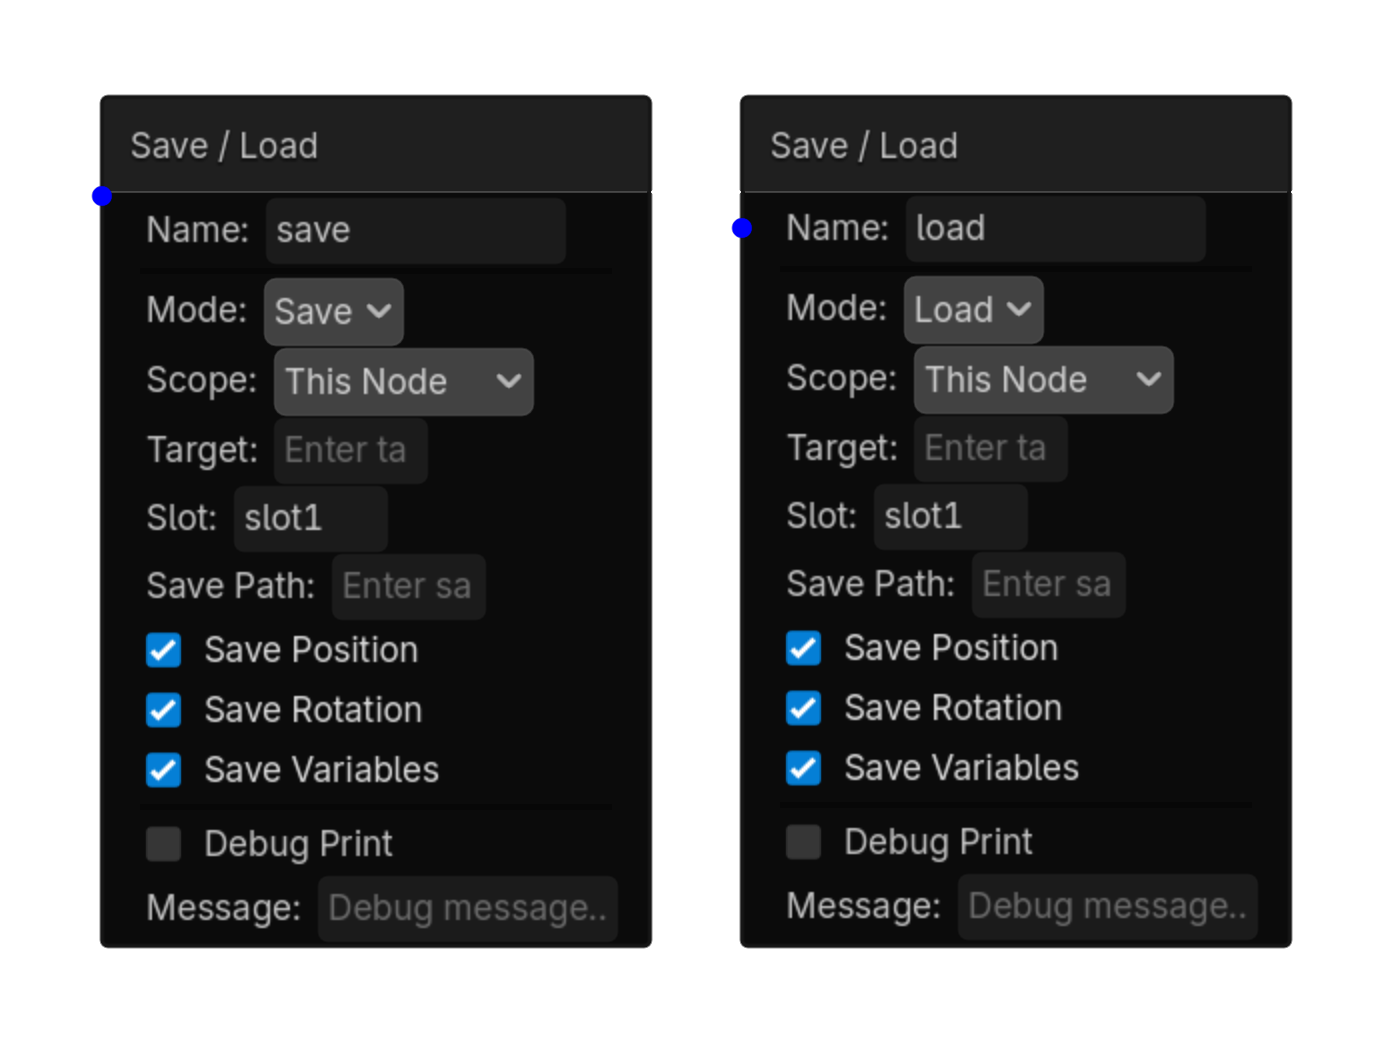
Save / Load

2D

Saves or restores 2D transforms, selected script variables, and optional RigidBody2D motion state.

MenuAdd Logic Brick → Actuators → Game
Sourceactuators/2d/save_load_2d_actuator.gd

Options

PropertyDetails
modeChoose Save or Load.
scopeThis Node, Target Node, or Group.
targetNode name or group used by the selected scope.
slotSave-slot filename. Default: slot1
save_positionInclude global position.
save_rotationInclude global rotation.
save_variablesInclude supported script variables.
restore_velocityWhen loading a RigidBody2D, restore saved velocity instead of stopping at the loaded transform.
Using this brick

Typical uses

  • Run Save / Load after a sensor and controller chain succeeds.
  • Combine it with states to enable the behavior only during the appropriate gameplay mode.

Example chain

SensorControllerSave / Load
TipLeave Restore Velocity disabled when loading should place a physics body at rest.
Common mistakeA target path must still exist when loading; renamed or reparented nodes may not match an older save file.
Save / Load actuator screenshot
Save / Load screenshot
RIGHT-CLICK SUBMENU

Game Feel

Right-click → Actuators → Game Feel

actuator • 2d

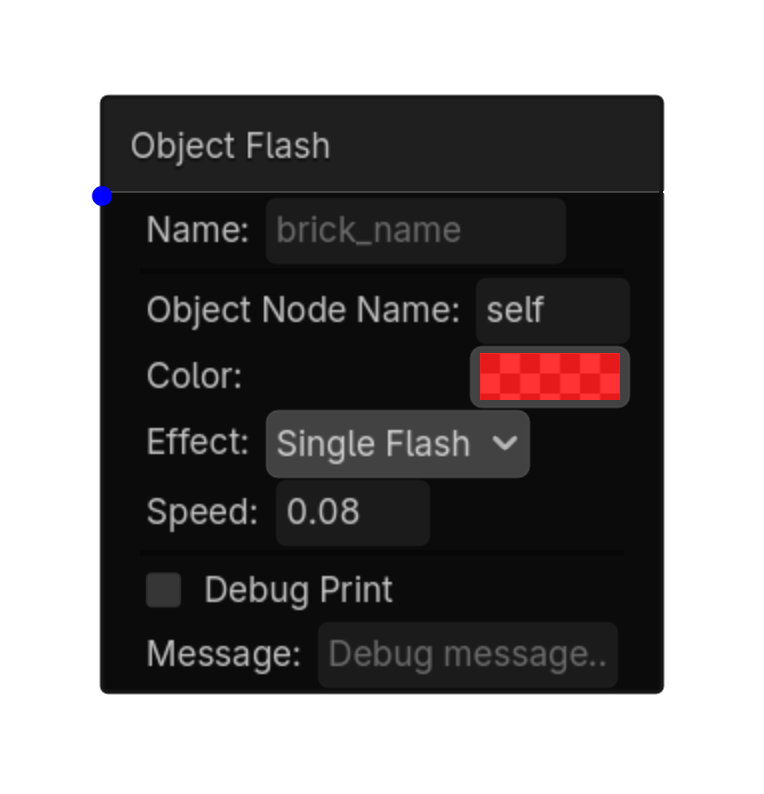
Object Flash

2D

Flashes a mesh/object with a temporary color overlay.\nType a node name, not a path.\n\

Menu Add Logic Brick → Actuators → Game Feel
Source actuators/3d/object_flash_actuator.gd

Options

Property Details
object_node_name Object Node Name
Default: self
color Color
Default: Color(1
effect Effect
Choices: Single Flash,Strobe,Color Strobe
Default: single_flash
speed Speed
Default: 0.08
Using this brick

Typical uses

  • Perform the general action described above after a sensor/controller chain succeeds.
  • Reuse the brick in multiple states or chains with different option values.
  • Pair it with an appropriate sensor to control when the action occurs.

Example chain

Choose a sensor Controller Object Flash
Tip Test the actuator with the simplest possible sensor first, then add variables, timing, or additional conditions.
Common mistake A continuously active sensor may run this actuator every frame. Use a one-shot condition when the action should happen only once.
Object Flash screenshot placeholder
Object Flash screenshot
actuator • shared

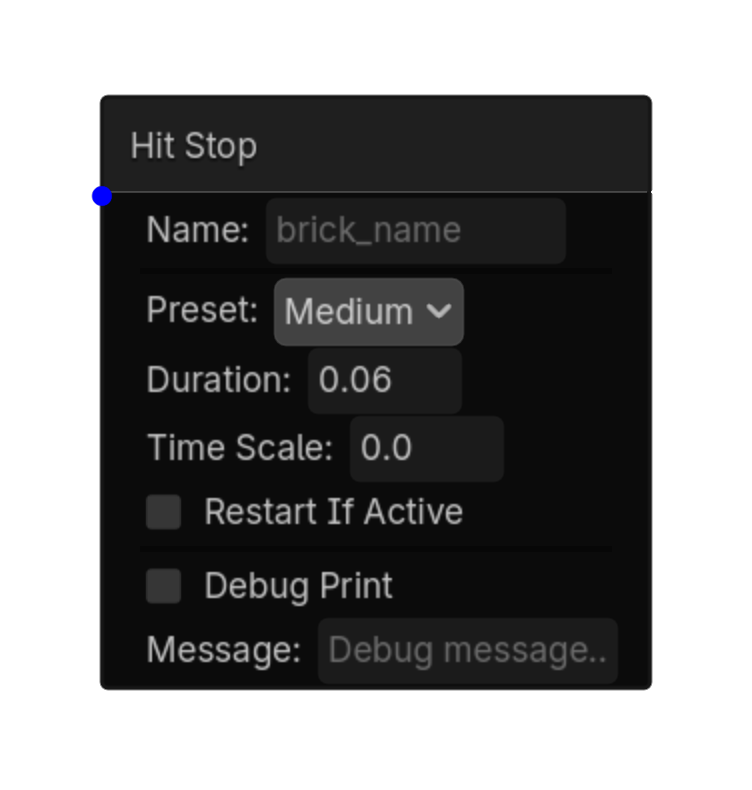
Hit Stop

2D

Briefly pauses or slows game time when an impact lands.\nUse for attacks, damage, blocks, heavy landings, and breaks.\nThis is also called hit pause or impact freeze.

Menu Add Logic Brick → Actuators → Game Feel
Source actuators/common/hit_stop_actuator.gd

Options

Property Details
preset Preset
Choices: Tiny,Light,Medium,Heavy,Custom
Default: medium
duration Duration
Default: 0.06
time_scale Time Scale
Default: 0.0
restart_if_active Restart If Active
Default: false
Using this brick

Typical uses

  • Perform the general action described above after a sensor/controller chain succeeds.
  • Reuse the brick in multiple states or chains with different option values.
  • Pair it with an appropriate sensor to control when the action occurs.

Example chain

Choose a sensor Controller Hit Stop
Tip Test the actuator with the simplest possible sensor first, then add variables, timing, or additional conditions.
Common mistake Timing options change how long the action takes; avoid retriggering the same transition every frame unless that behavior is intentional.
Hit Stop screenshot placeholder
Hit Stop screenshot
actuator • shared

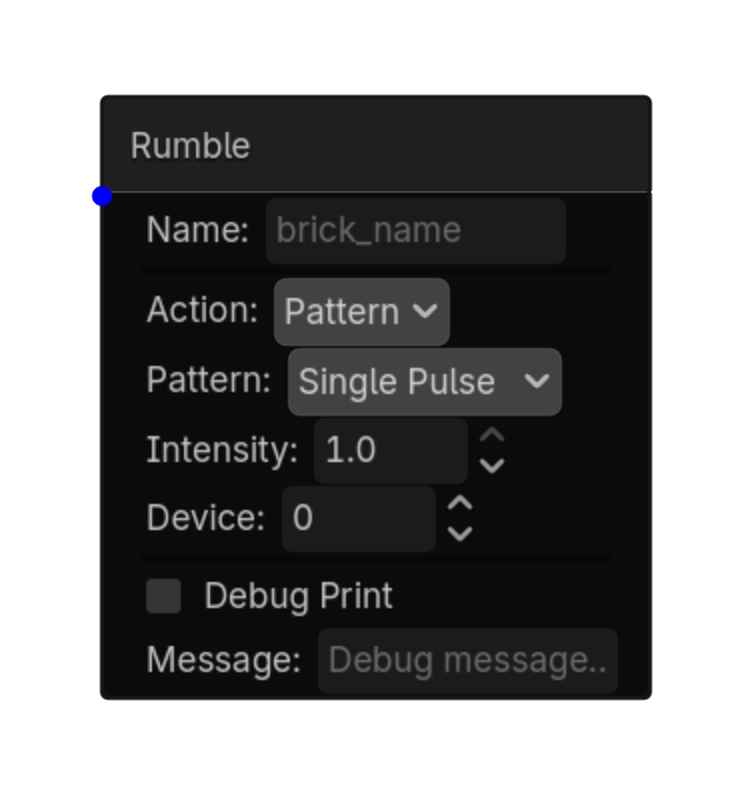
Rumble

2D

Trigger controller haptic vibration.\nVibrate: manual motor control for a set duration.\nStop: immediately stop all vibration.\nPattern: built-in presets that play to completion.\nThe sensor only needs to fire once — the pattern finishes even if the sensor stops.

Menu Add Logic Brick → Actuators → Game Feel
Source actuators/common/rumble_actuator.gd

Options

Property Details
action Action
Choices: Vibrate,Stop,Pattern
Default: pattern
weak_motor Weak Motor
Choices: 0.0,1.0
Default: 0.5
strong_motor Strong Motor
Choices: 0.0,1.0
Default: 0.5
duration Duration
Default: 0.5
pattern Pattern
Choices: Single Pulse,Double Pulse,Sustained,Ramp Up,Ramp Down,Heartbeat
Default: single_pulse
intensity Intensity
Choices: 0.0,1.0
Default: 1.0
device Device
Default: 0
Using this brick

Typical uses

  • Perform the general action described above after a sensor/controller chain succeeds.
  • Reuse the brick in multiple states or chains with different option values.
  • Pair it with an appropriate sensor to control when the action occurs.

Example chain

Choose a sensor Controller Rumble
Tip Test the actuator with the simplest possible sensor first, then add variables, timing, or additional conditions.
Common mistake Timing options change how long the action takes; avoid retriggering the same transition every frame unless that behavior is intentional.
Rumble screenshot placeholder
Rumble screenshot
actuator • shared

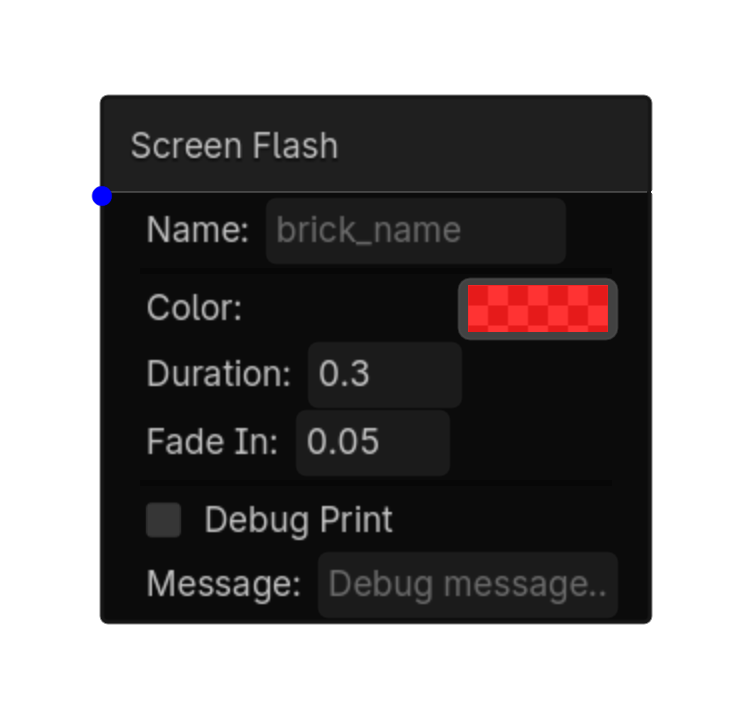
Screen Flash

2D

Flashes a color over the screen.\nPress \

Menu Add Logic Brick → Actuators → Game Feel
Source actuators/common/screen_flash_actuator.gd

Options

Property Details
color Color
Default: Color(1
duration Duration
Default: 0.3
fade_in Fade In
Default: 0.05
Using this brick

Typical uses

  • Perform the general action described above after a sensor/controller chain succeeds.
  • Reuse the brick in multiple states or chains with different option values.
  • Pair it with an appropriate sensor to control when the action occurs.

Example chain

Choose a sensor Controller Screen Flash
Tip Test the actuator with the simplest possible sensor first, then add variables, timing, or additional conditions.
Common mistake Timing options change how long the action takes; avoid retriggering the same transition every frame unless that behavior is intentional.
Screen Flash screenshot placeholder
Screen Flash screenshot
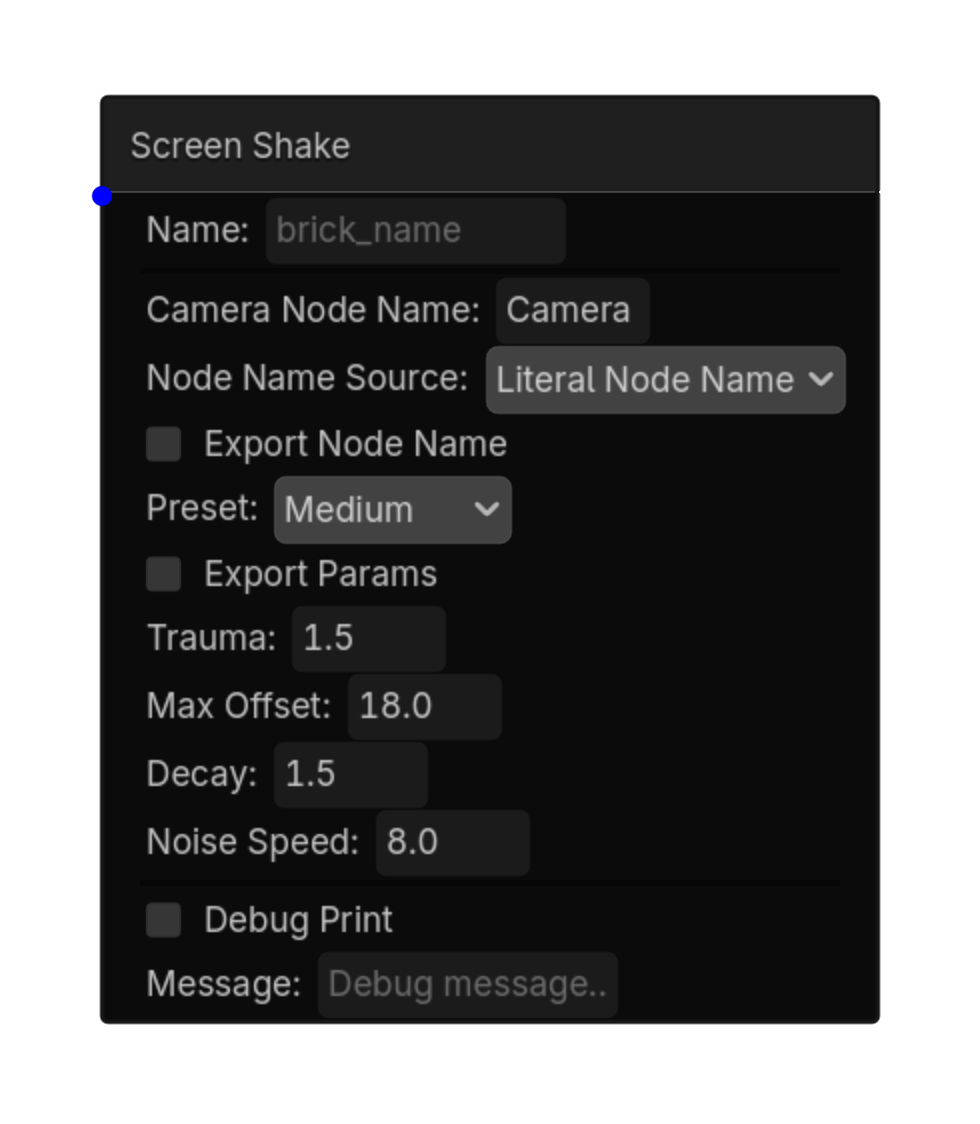
actuator • 2d

Camera Shake

2D

Temporarily shakes a Camera2D by changing its offset and rotation, then restores the original camera state.

MenuAdd Logic Brick → Actuators → Game Feel
Sourceactuators/2d/screen_shake_2d_actuator.gd

Options

PropertyDetails
camera_node_nameCamera2D node to shake. Default: Camera2D
intensityMaximum positional shake amount.
durationShake duration in seconds.
rotation_intensityMaximum rotational shake in degrees.
Using this brick

Typical uses

  • Run Camera Shake after a sensor and controller chain succeeds.
  • Combine it with states to enable the behavior only during the appropriate gameplay mode.

Example chain

SensorControllerCamera Shake
TipUse a just-pressed or one-shot sensor to start a single shake.
Common mistakeA continuously active sensor can restart the shake repeatedly.
Camera Shake actuator screenshot
Camera Shake screenshot
actuator • 2d

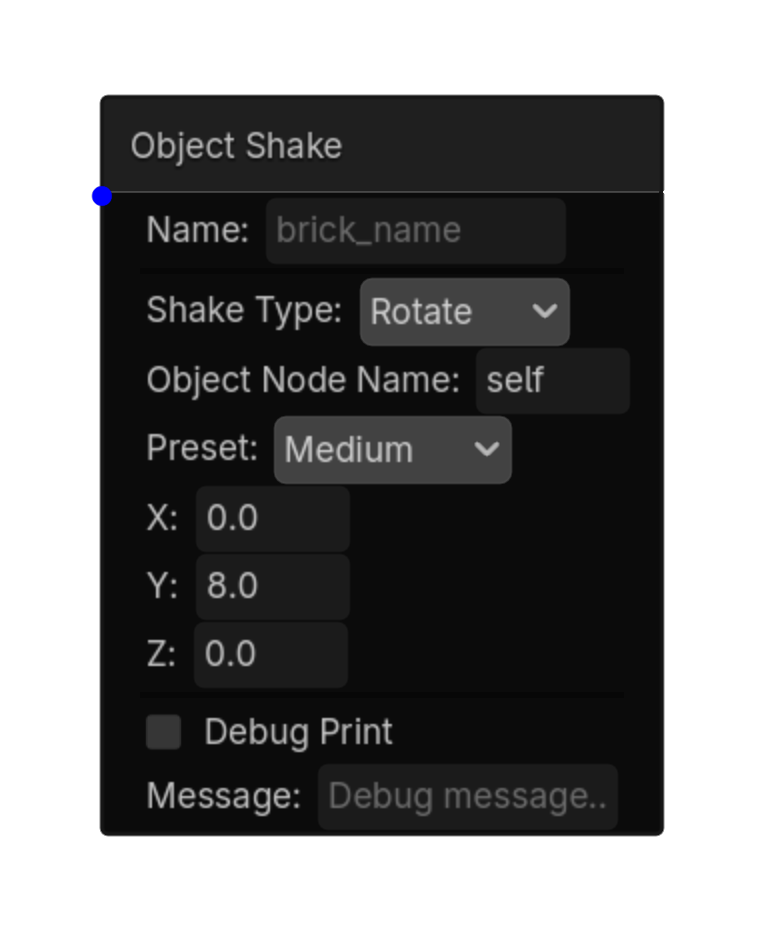
Object Shake

2D

Shakes a Node2D around a captured baseline transform and restores its exact original position and rotation.

MenuAdd Logic Brick → Actuators → Game Feel
Sourceactuators/2d/object_shake_2d_actuator.gd

Options

PropertyDetails
target_node_nameNode2D to shake. Empty uses the brick owner.
intensityMaximum positional offset.
durationShake duration in seconds.
rotation_intensityMaximum rotational offset in degrees.
Using this brick

Typical uses

  • Run Object Shake after a sensor and controller chain succeeds.
  • Combine it with states to enable the behavior only during the appropriate gameplay mode.

Example chain

SensorControllerObject Shake
TipThe actuator keeps a persistent baseline so repeated triggers do not cause positional drift.
Common mistakeAvoid moving the target through another system during the same shake unless that movement is intended to be overwritten by the final restore.
Object Shake actuator screenshot
Object Shake screenshot
RIGHT-CLICK SUBMENU

Logic

Right-click → Actuators → Logic

actuator • shared

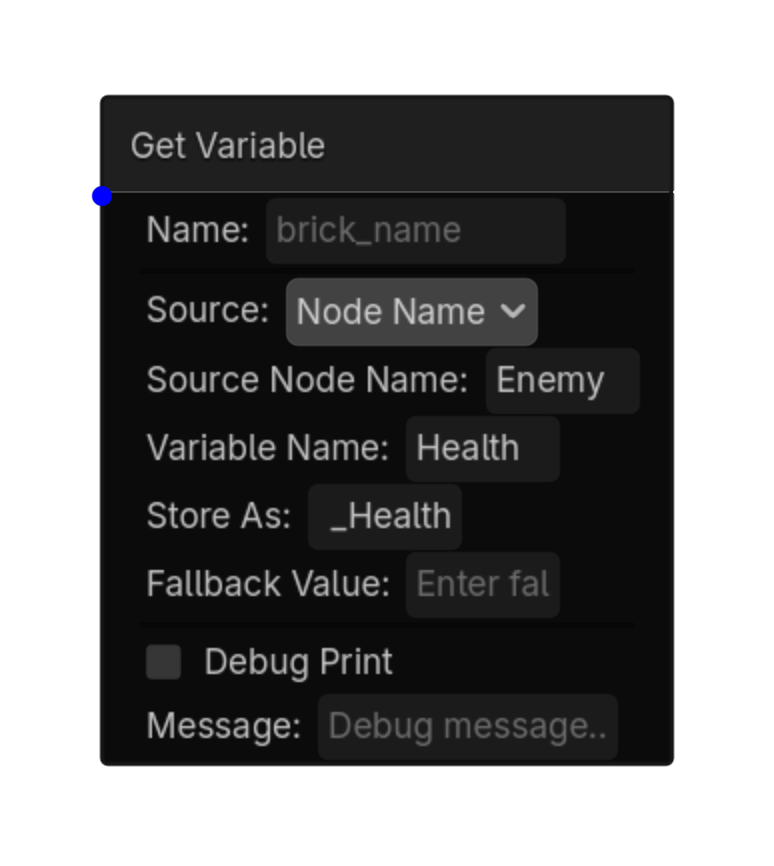
Get Variable

2D

Reads a variable from self, another node, or GlobalVars and stores it for later bricks.

Menu Add Logic Brick → Actuators → Logic
Source actuators/common/get_variable_actuator.gd

Options

Property Details
source Source
Choices: Self,Node Name,GlobalVars
Default: node_name
source_node_name Source Node Name
variable_name Variable Name
store_as Store As
fallback_value Fallback Value
Using this brick

Typical uses

  • Perform the logic action described above after a sensor/controller chain succeeds.
  • Reuse the brick in multiple states or chains with different option values.
  • Pair it with an appropriate sensor to control when the action occurs.

Example chain

Choose a sensor Controller Get Variable
Tip Test the actuator with the simplest possible sensor first, then add variables, timing, or additional conditions.
Common mistake A continuously active sensor may run this actuator every frame. Use a one-shot condition when the action should happen only once.
Get Variable screenshot placeholder
Get Variable screenshot
actuator • shared

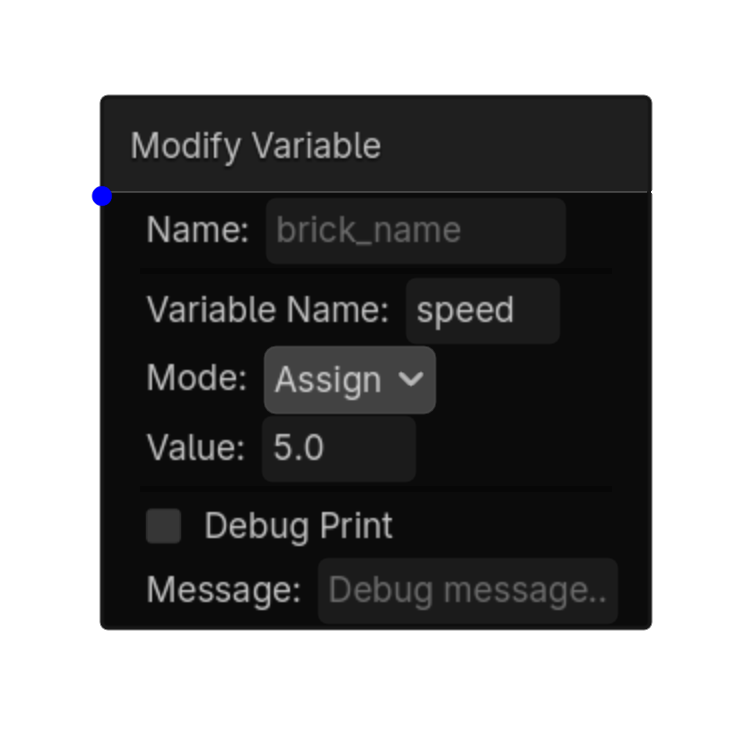
Modify Variable

2D

Modifies a variable's value.\nWorks with local and global variables.\nAutomatically uses GlobalVars if not found locally.

Menu Add Logic Brick → Actuators → Logic
Source actuators/common/variable_actuator.gd

Options

Property Details
variable_name Variable Name
mode Mode
Choices: Assign,Add,Copy,Toggle
Default: assign
value Value
source_variable Source Variable
Using this brick

Typical uses

  • Perform the general action described above after a sensor/controller chain succeeds.
  • Reuse the brick in multiple states or chains with different option values.
  • Pair it with an appropriate sensor to control when the action occurs.

Example chain

Choose a sensor Controller Modify Variable
Tip Test the actuator with the simplest possible sensor first, then add variables, timing, or additional conditions.
Common mistake A continuously active sensor may run this actuator every frame. Use a one-shot condition when the action should happen only once.
Modify Variable screenshot placeholder
Modify Variable screenshot
actuator • shared

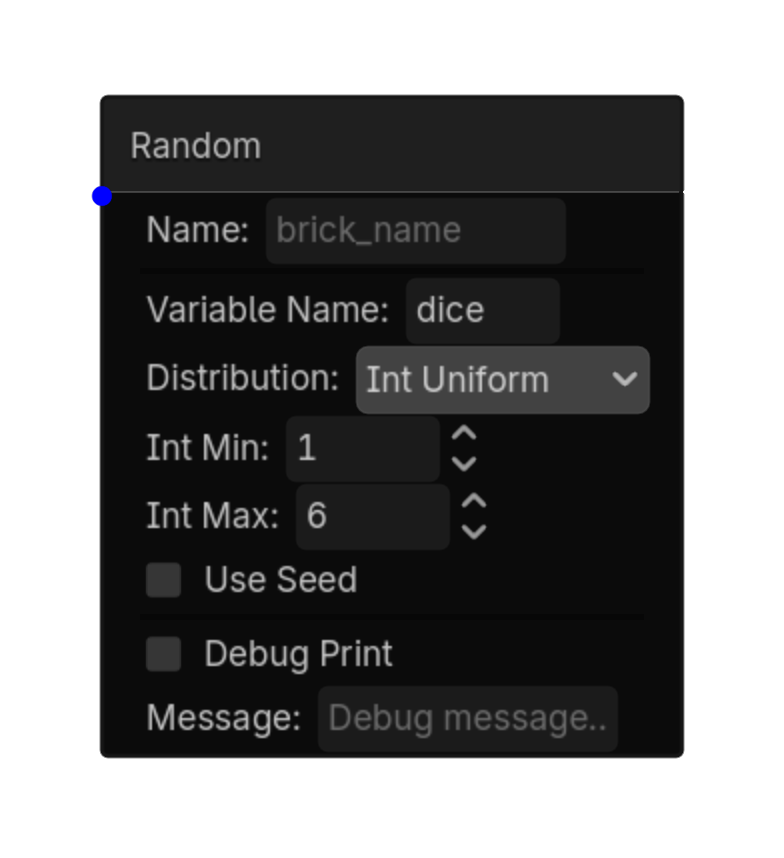
Random

2D

Similar to UPBGE's Random actuator

Menu Add Logic Brick → Actuators → Logic
Source actuators/common/random_actuator.gd

Options

Property Details
variable_name Variable Name
distribution Distribution
Choices: Bool Constant,Bool Uniform,Bool Bernoulli,Int Constant,Int Uniform,Int Poisson,Float Constant,Float Uniform,Float Normal,Float Neg Exp
Default: int_uniform
bool_value Bool Value
Default: true
bool_probability Bool Probability
Default: 0.5
int_value Int Value
Default: 0
int_min Int Min
Default: 0
int_max Int Max
Default: 100
int_lambda Int Lambda
Default: 1.0
float_value Float Value
Default: 0.0
float_min Float Min
Default: 0.0
float_max Float Max
Default: 1.0
float_mean Float Mean
Default: 0.0
float_stddev Float Stddev
Default: 1.0
float_lambda Float Lambda
Default: 1.0
use_seed Use Seed
Default: false
seed_value Seed Value
Default: 0
Using this brick

Typical uses

  • Perform the general action described above after a sensor/controller chain succeeds.
  • Reuse the brick in multiple states or chains with different option values.
  • Pair it with an appropriate sensor to control when the action occurs.

Example chain

Choose a sensor Controller Random
Tip Test the actuator with the simplest possible sensor first, then add variables, timing, or additional conditions.
Common mistake A continuously active sensor may run this actuator every frame. Use a one-shot condition when the action should happen only once.
Random screenshot placeholder
Random screenshot
actuator • shared

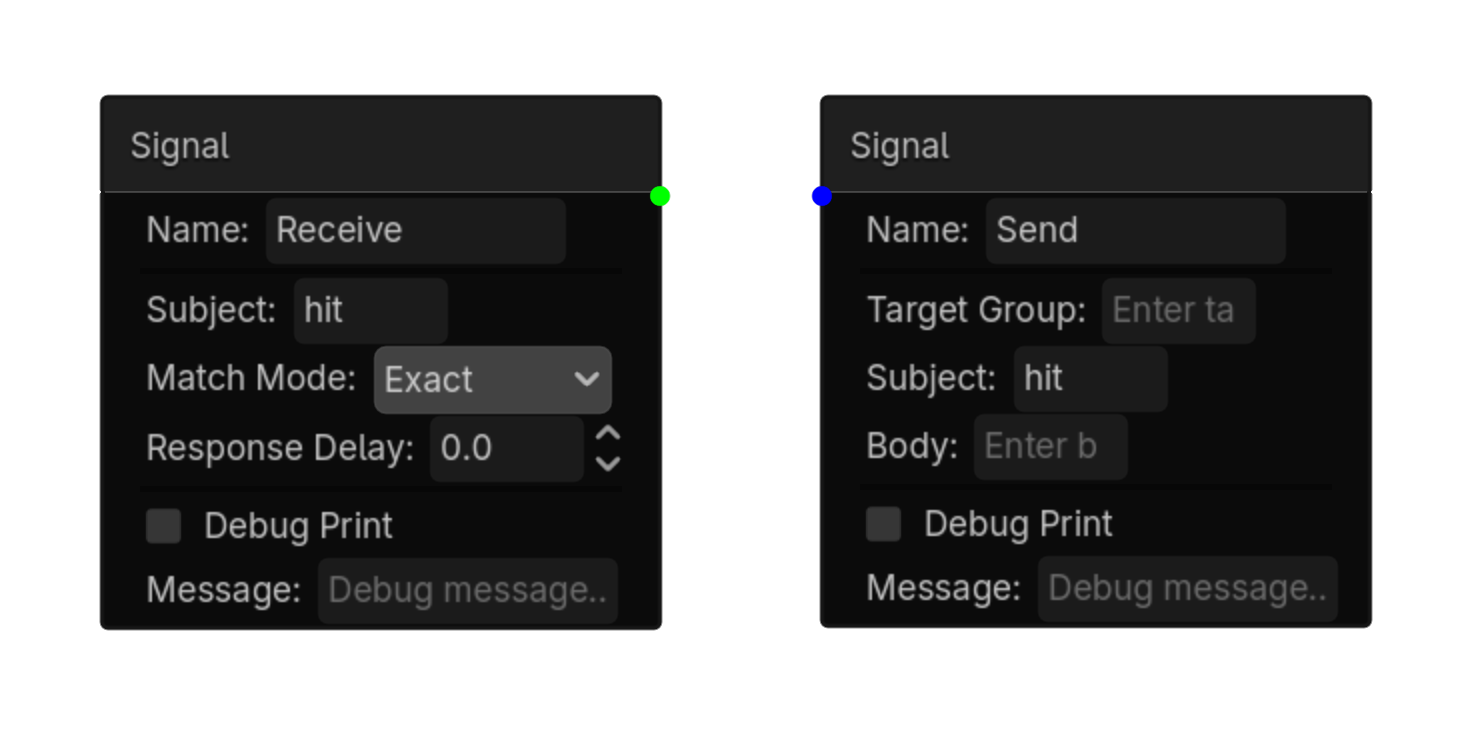
Signal

2D

Sends a signal to other nodes.\nReceiving nodes need a Signal Sensor listening for the subject.

Menu Add Logic Brick → Actuators → Logic
Source actuators/common/message_actuator.gd

Options

Property Details
target_group Target Group
subject Subject
body Body
Using this brick

Typical uses

  • Perform the general action described above after a sensor/controller chain succeeds.
  • Reuse the brick in multiple states or chains with different option values.
  • Pair it with an appropriate sensor to control when the action occurs.

Example chain

Choose a sensor Controller Signal
Tip Test the actuator with the simplest possible sensor first, then add variables, timing, or additional conditions.
Common mistake A continuously active sensor may run this actuator every frame. Use a one-shot condition when the action should happen only once.
Signal screenshot placeholder
Signal screenshot
actuator • shared

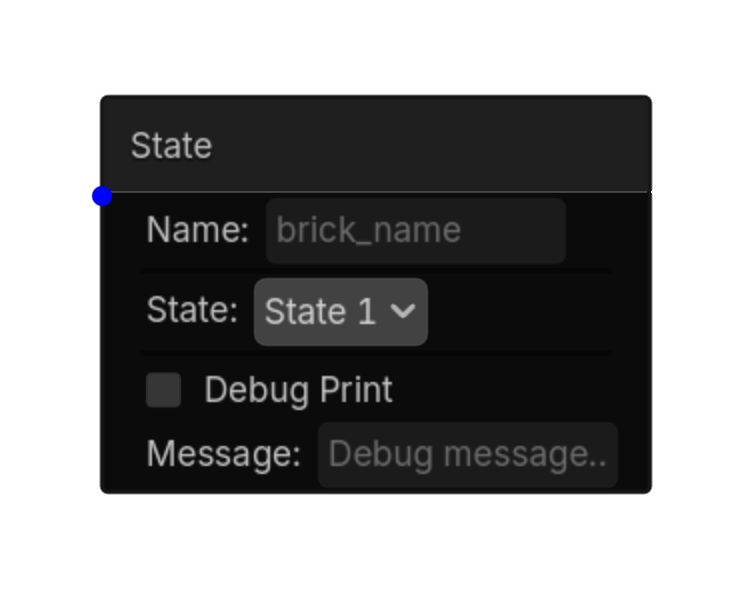
State

2D

State logic brick.

Menu Add Logic Brick → Actuators → Logic
Source actuators/common/state_actuator.gd

Options

Property Details
state_id State Id
Choices: __STATE_LIST__
Using this brick

Typical uses

  • Perform the general action described above after a sensor/controller chain succeeds.
  • Reuse the brick in multiple states or chains with different option values.
  • Pair it with an appropriate sensor to control when the action occurs.

Example chain

Choose a sensor Controller State
Tip Test the actuator with the simplest possible sensor first, then add variables, timing, or additional conditions.
Common mistake A continuously active sensor may run this actuator every frame. Use a one-shot condition when the action should happen only once.
State screenshot placeholder
State screenshot
RIGHT-CLICK SUBMENU

Motion

Right-click → Actuators → Motion

actuator • 2d

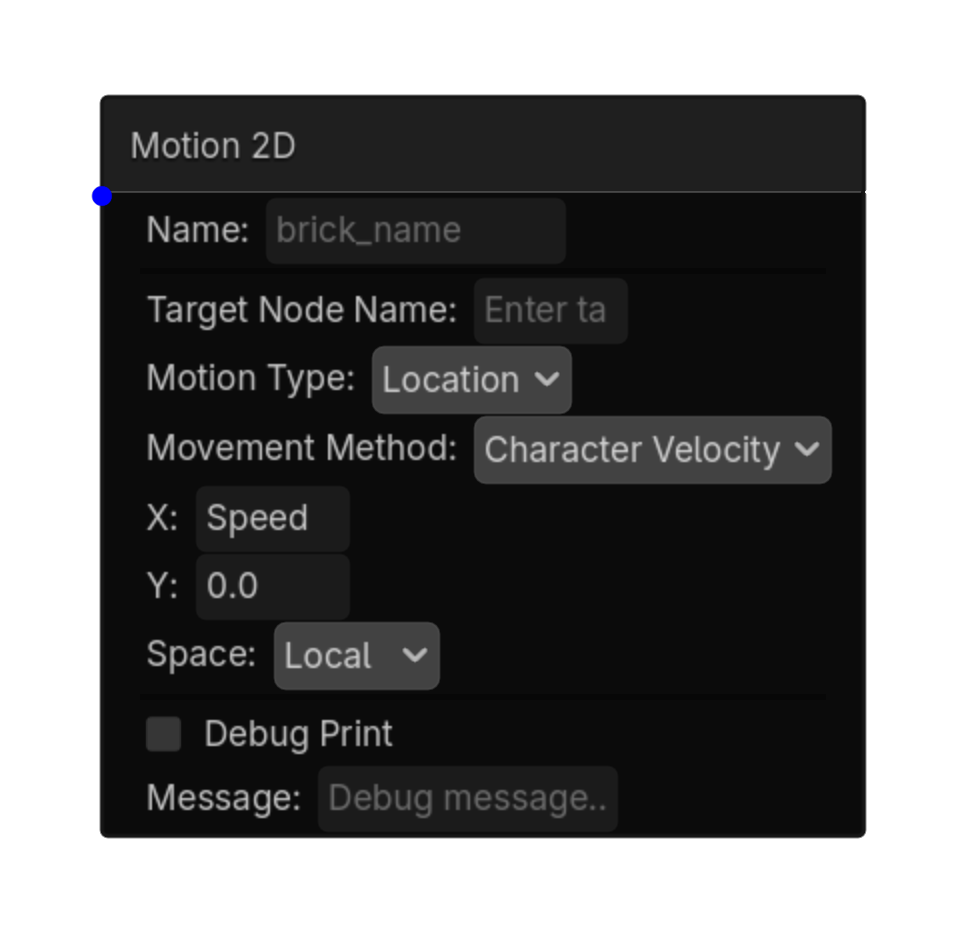
Motion 2D

2D

For CharacterBody2D movement, this only requests/accumulates velocity for the frame. Character 2D Physics should be used once on the character to apply friction, gravity, diagonal normalization, and move_and_slide().

Menu Add Logic Brick → Actuators → Motion
Source actuators/2d/motion_2d_actuator.gd

Options

Property Details
target_node_name Target Node Name
blank = self, or child/node name
motion_type Motion Type
Choices: Location,Rotation
Default: location
movement_method Movement Method
Choices: Character Velocity,Translate,Position
Default: character_velocity
x X
Default: 0.0
y Y
Default: 0.0
space Space
Choices: Local,Global
Default: local
Using this brick

Typical uses

  • Perform the motion action described above after a sensor/controller chain succeeds.
  • Reuse the brick in multiple states or chains with different option values.
  • Target a specific node by configuring the node field before testing the chain.

Example chain

Choose a sensor Controller Motion 2D
Tip Confirm the target node name and node type before troubleshooting the rest of the chain.
Common mistake A continuously active sensor may run this actuator every frame. Use a one-shot condition when the action should happen only once.
Motion 2D screenshot placeholder
Motion 2D screenshot
actuator • 2d

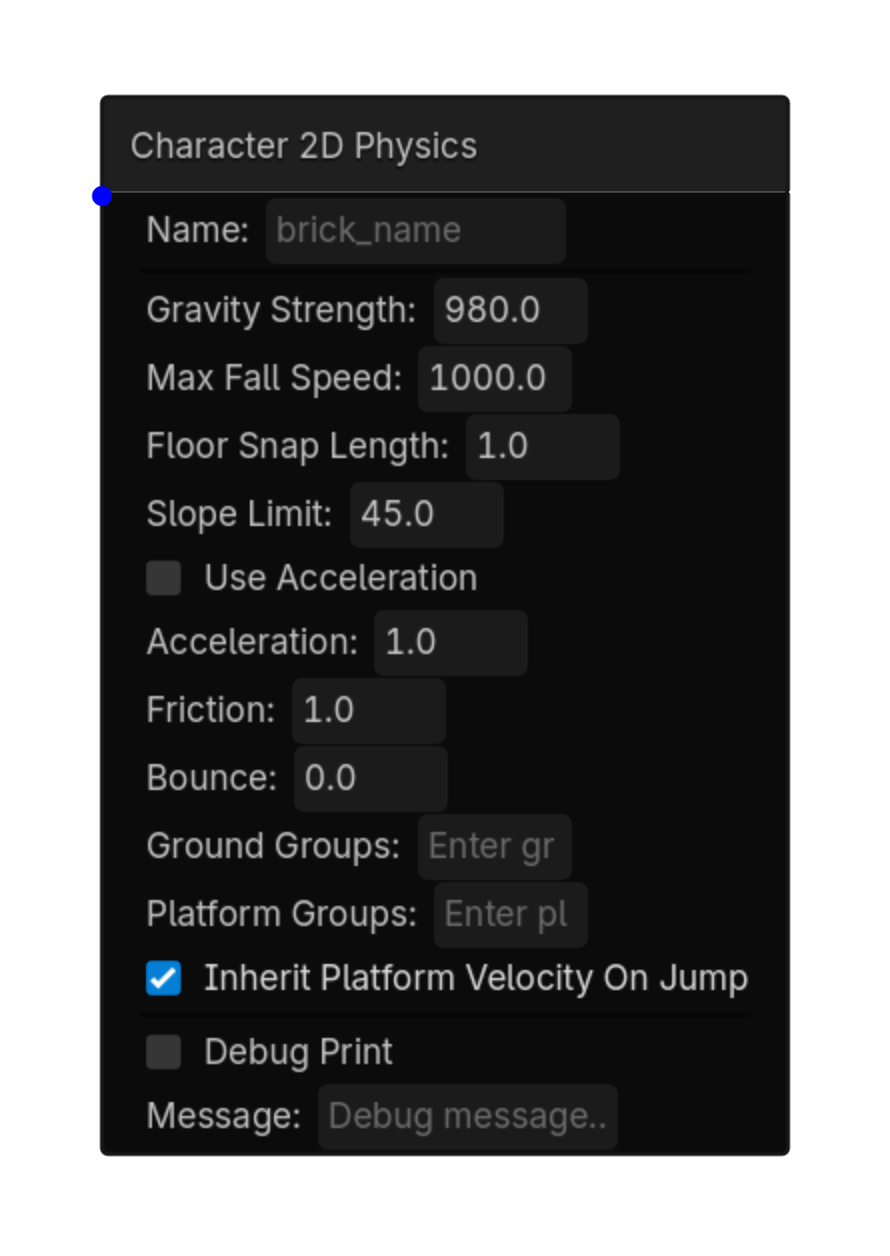
Character 2D Physics

2D

Finalizes CharacterBody2D movement once per physics frame. Motion 2D bricks add requested movement; this brick applies gravity, friction, acceleration, snapping, slope limits, bounce, and move_and_slide().

Menu Add Logic Brick → Actuators → Motion
Source actuators/2d/character_2d_actuator.gd

Options

Property Details
gravity_strength Gravity Strength
Default: 980.0
max_fall_speed Max Fall Speed
Default: 1000.0
floor_snap_length Floor Snap Length
Default: 1.0
slope_limit Slope Limit
Default: 45.0
use_acceleration Use Acceleration
Default: false
acceleration Acceleration
Default: 1.0
friction Friction
Default: 1.0
bounce Bounce
Default: 0.0
ground_groups Ground Groups
Enter ground groups
platform_groups Platform Groups
Enter platform groups
inherit_platform_velocity_on_jump Inherit Platform Velocity On Jump
Default: true
Using this brick

Typical uses

  • Perform the motion action described above after a sensor/controller chain succeeds.
  • Reuse the brick in multiple states or chains with different option values.
  • Pair it with an appropriate sensor to control when the action occurs.

Example chain

Choose a sensor Controller Character 2D Physics
Tip Test the actuator with the simplest possible sensor first, then add variables, timing, or additional conditions.
Common mistake A continuously active sensor may run this actuator every frame. Use a one-shot condition when the action should happen only once.
Character 2D Physics screenshot placeholder
Character 2D Physics screenshot
actuator • 2d

Character Jump 2D

2D

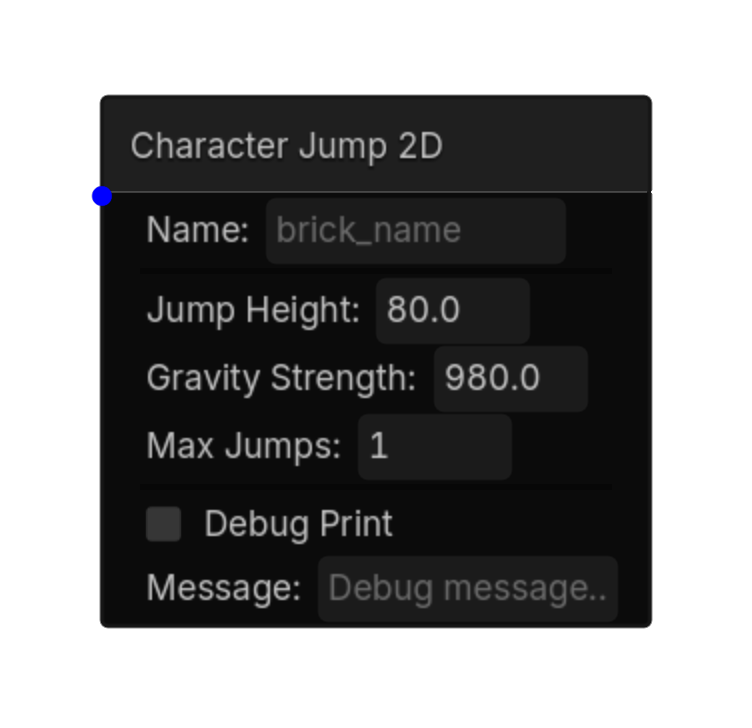
Character Jump 2D logic brick.

Menu Add Logic Brick → Actuators → Motion
Source actuators/2d/jump_2d_actuator.gd

This brick exposes no configurable properties.
Using this brick

Typical uses

  • Perform the general action described above after a sensor/controller chain succeeds.
  • Reuse the brick in multiple states or chains with different option values.
  • Pair it with an appropriate sensor to control when the action occurs.

Example chain

Choose a sensor Controller Character Jump 2D
Tip Test the actuator with the simplest possible sensor first, then add variables, timing, or additional conditions.
Common mistake A continuously active sensor may run this actuator every frame. Use a one-shot condition when the action should happen only once.
Character Jump 2D screenshot placeholder
Character Jump 2D screenshot
actuator • 2d

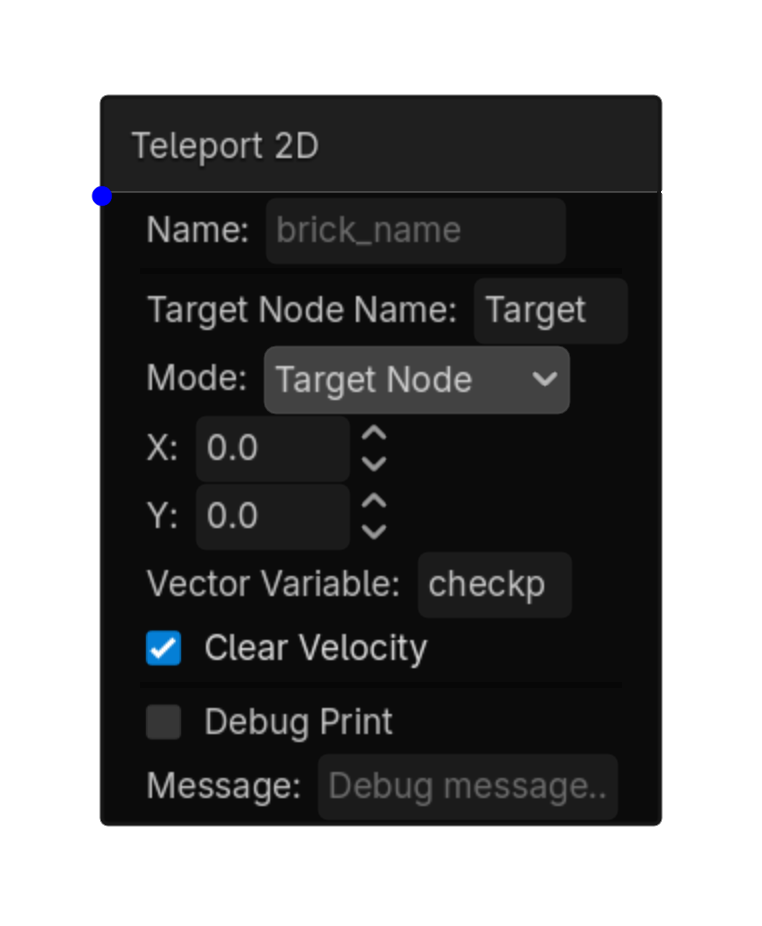
Teleport 2D

2D

Instantly sets position to a target Node2D or coordinates.\nUseful for respawning, portals, checkpoints, and spawn points.

Menu Add Logic Brick → Actuators → Motion
Source actuators/2d/teleport_2d_actuator.gd

Options

Property Details
target_node_name Target Node Name
Default: Target
Target Node2D node name
mode Mode
Choices: Target Node,Coordinates,Vector Variable
Default: target_node
x X
Default: 0.0
y Y
Default: 0.0
vector_variable Vector Variable
clear_velocity Clear Velocity
Default: true
Using this brick

Typical uses

  • Perform the motion action described above after a sensor/controller chain succeeds.
  • Reuse the brick in multiple states or chains with different option values.
  • Target a specific node by configuring the node field before testing the chain.

Example chain

Choose a sensor Controller Teleport 2D
Tip Confirm the target node name and node type before troubleshooting the rest of the chain.
Common mistake A continuously active sensor may run this actuator every frame. Use a one-shot condition when the action should happen only once.
Teleport 2D screenshot placeholder
Teleport 2D screenshot
actuator • 2d

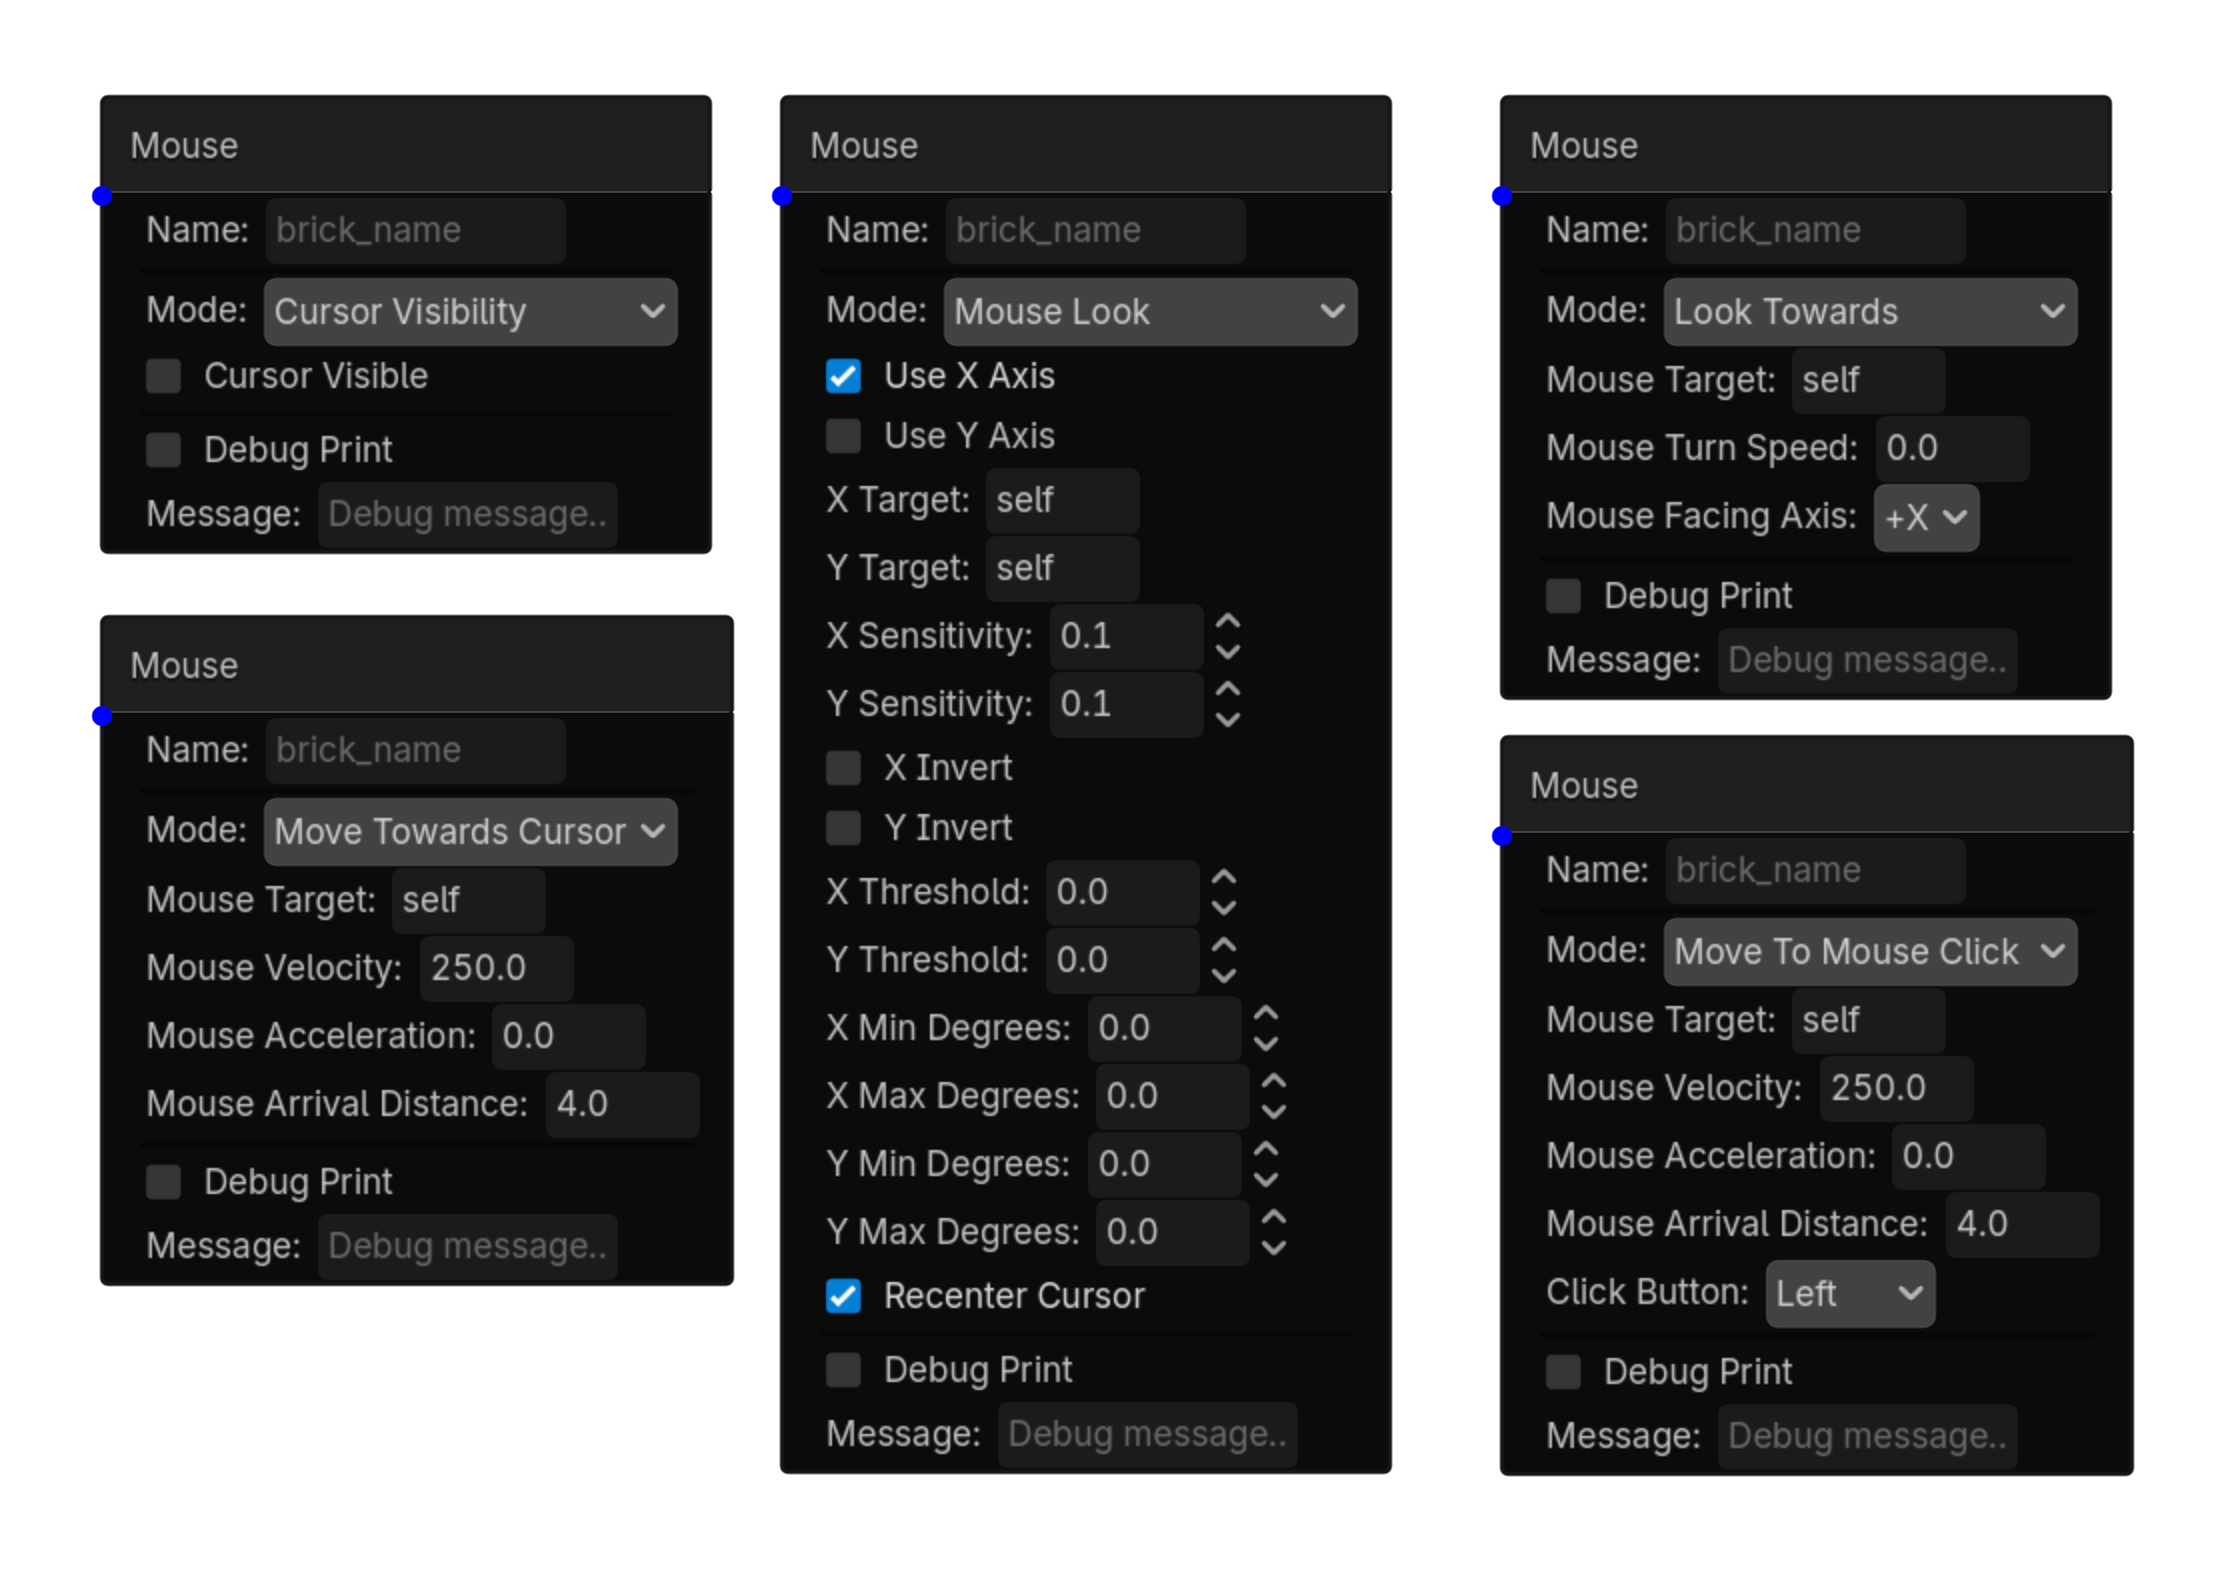
Mouse

2D

Toggle cursor visibility or rotate object based on mouse movement

Menu Add Logic Brick → Actuators → Motion
Source actuators/3d/mouse_actuator.gd

Options

Property Details
mode Mode
Choices: Cursor Visibility,Mouse Look,Look Towards,Move Towards Cursor,Move To Mouse Click
Default: cursor_visibility
cursor_visible Cursor Visible
Default: false
use_x_axis Use X Axis
Default: true
use_y_axis Use Y Axis
Default: true
x_target X Target
Default: self
y_target Y Target
Default: self
x_sensitivity X Sensitivity
Default: 0.1
y_sensitivity Y Sensitivity
Default: 0.1
x_invert X Invert
Default: false
y_invert Y Invert
Default: false
x_threshold X Threshold
Default: 0.0
y_threshold Y Threshold
Default: 0.0
x_min_degrees X Min Degrees
Default: 0.0
x_max_degrees X Max Degrees
Default: 0.0
y_min_degrees Y Min Degrees
Default: -90.0
y_max_degrees Y Max Degrees
Default: 90.0
x_rotation_axis X Rotation Axis
Choices: X,Y,Z
Default: y
y_rotation_axis Y Rotation Axis
Choices: X,Y,Z
Default: x
x_use_local X Use Local
Default: false
y_use_local Y Use Local
Default: false
recenter_cursor Recenter Cursor
Default: true
mouse_target Mouse Target
Default: self
mouse_velocity Mouse Velocity
Default: 5.0
mouse_acceleration Mouse Acceleration
Default: 0.0
mouse_turn_speed Mouse Turn Speed
Default: 0.0
mouse_arrival_distance Mouse Arrival Distance
Default: 0.1
mouse_facing_axis Mouse Facing Axis
Choices: +X,-X,+Y,-Y,+Z,-Z
Default: +z
mouse_lock_y Mouse Lock Y
Default: true
click_button Click Button
Choices: Left,Right,Middle
Default: left
Using this brick

Typical uses

  • Perform the general action described above after a sensor/controller chain succeeds.
  • Reuse the brick in multiple states or chains with different option values.
  • Pair it with an appropriate sensor to control when the action occurs.

Example chain

Choose a sensor Controller Mouse
Tip Test the actuator with the simplest possible sensor first, then add variables, timing, or additional conditions.
Common mistake A continuously active sensor may run this actuator every frame. Use a one-shot condition when the action should happen only once.
Mouse screenshot placeholder
Mouse screenshot
actuator • 2d

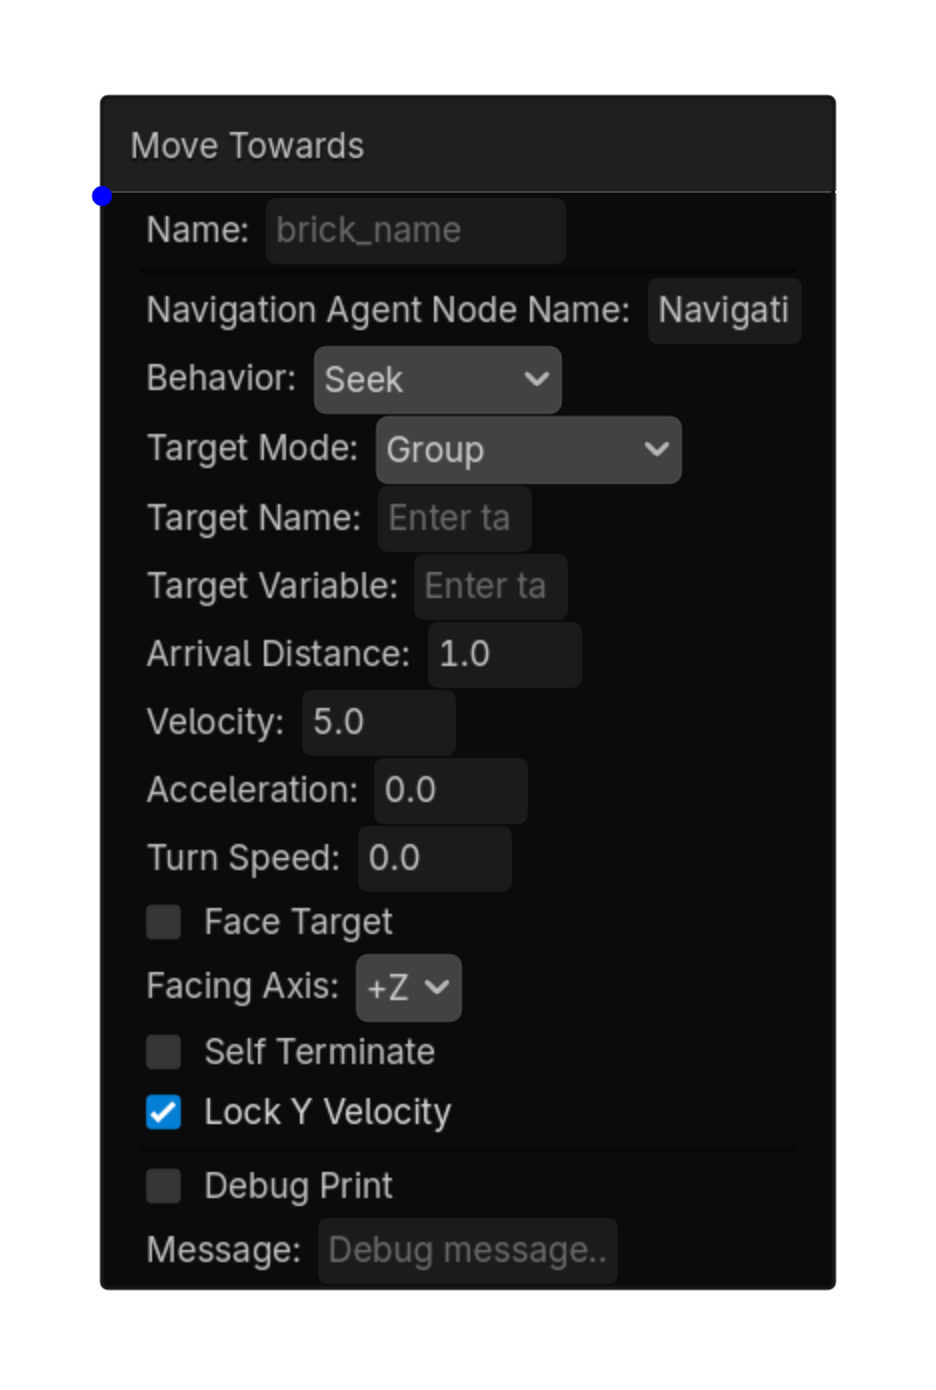
Move Towards

2D

Moves or flees from a node, group member, or 2D coordinate with optional facing and navigation support.

MenuAdd Logic Brick → Actuators → Motion
Sourceactuators/2d/move_towards_2d_actuator.gd

Options

PropertyDetails
behaviorSeek or Flee.
target_modeNode Name, Group, or Coordinates.
target_nameTarget node name or group name.
coordinate_x / coordinate_yLiteral values or variables used for coordinate targeting.
speedMovement speed in pixels per second.
arrival_distanceDistance at which seeking stops.
face_targetRotate to face the movement direction.
use_navigationUse a NavigationAgent2D when available.
Using this brick

Typical uses

  • Run Move Towards after a sensor and controller chain succeeds.
  • Combine it with states to enable the behavior only during the appropriate gameplay mode.

Example chain

SensorControllerMove Towards
TipUse Coordinates with variables to move toward a position captured by Get Transforms.
Common mistakeCharacterBody2D movement requires collision-aware velocity handling; test against walls and slopes.
Move Towards actuator screenshot
Move Towards screenshot
actuator • 2d

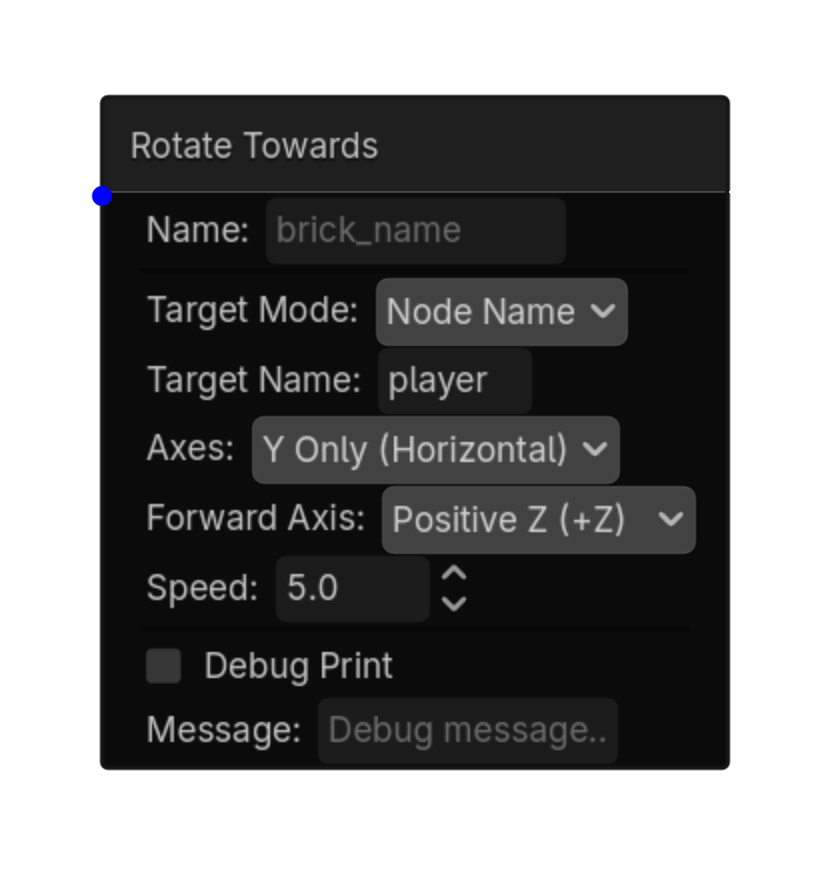
Rotate Towards

2D

Rotates a Node2D toward a target node or nearest group member using 2D angular interpolation.

MenuAdd Logic Brick → Actuators → Motion
Sourceactuators/2d/rotate_towards_2d_actuator.gd

Options

PropertyDetails
target_modeNode Name or Group.
target_nameTarget node or group.
speedRotation speed in degrees per second.
angle_offsetAdditional angle offset in degrees.
Using this brick

Typical uses

  • Run Rotate Towards after a sensor and controller chain succeeds.
  • Combine it with states to enable the behavior only during the appropriate gameplay mode.

Example chain

SensorControllerRotate Towards
TipUse Angle Offset when the artwork faces up or another direction instead of Godot’s positive X axis.
Common mistakeEntering a group with no active Node2D members leaves the actuator without a valid target.
Rotate Towards actuator screenshot
Rotate Towards screenshot
actuator • 2d

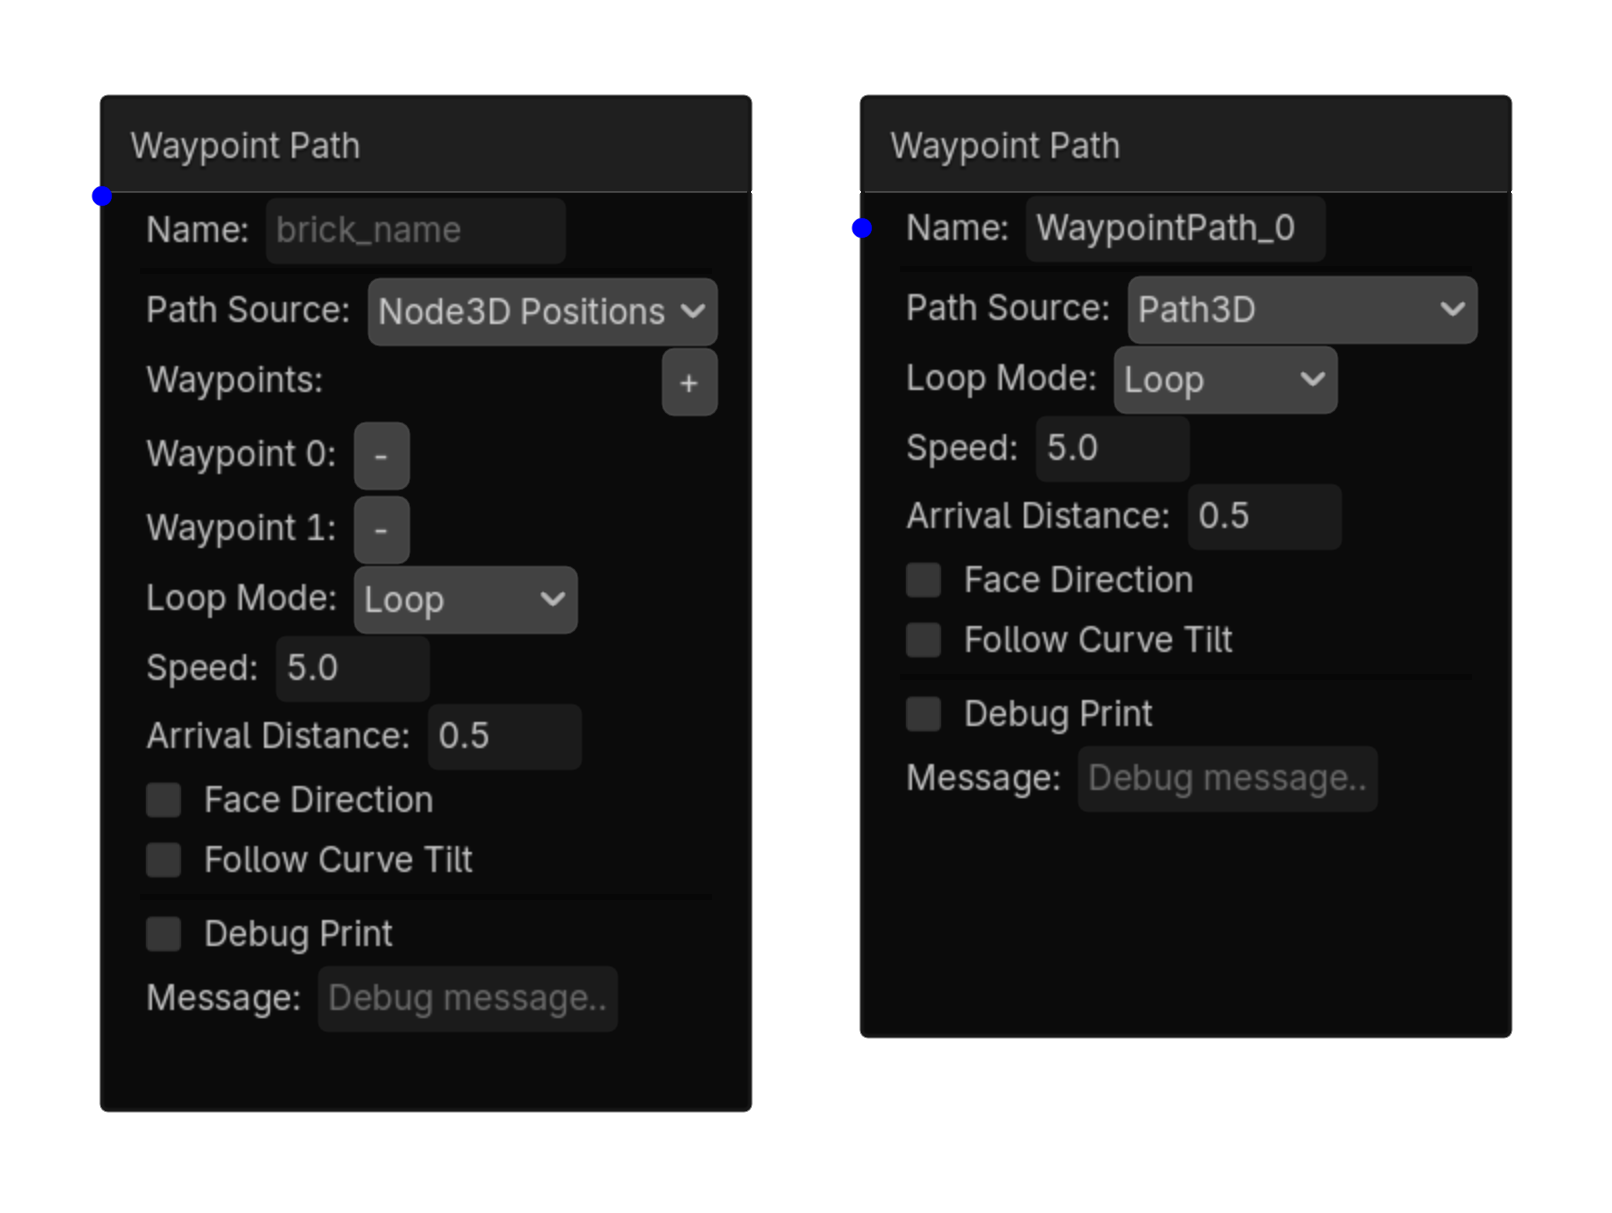
Waypoint Path

2D

Moves a Node2D along the points of a Path2D curve with optional looping and direction-facing.

MenuAdd Logic Brick → Actuators → Motion
Sourceactuators/2d/waypoint_path_2d_actuator.gd

Options

PropertyDetails
path_node_namePath2D containing the Curve2D to follow.
speedMovement speed in pixels per second.
loopReturn to the first waypoint after the last point.
face_directionRotate the moving node to face its travel direction.
Using this brick

Typical uses

  • Run Waypoint Path after a sensor and controller chain succeeds.
  • Combine it with states to enable the behavior only during the appropriate gameplay mode.

Example chain

SensorControllerWaypoint Path
TipAdd at least two points to the Path2D curve before testing.
Common mistakeThe actuator follows the Path2D curve points; an empty curve cannot produce movement.
Waypoint Path actuator screenshot
Waypoint Path screenshot
RIGHT-CLICK SUBMENU

Object

Right-click → Actuators → Object

actuator • shared

Get Transforms

2D

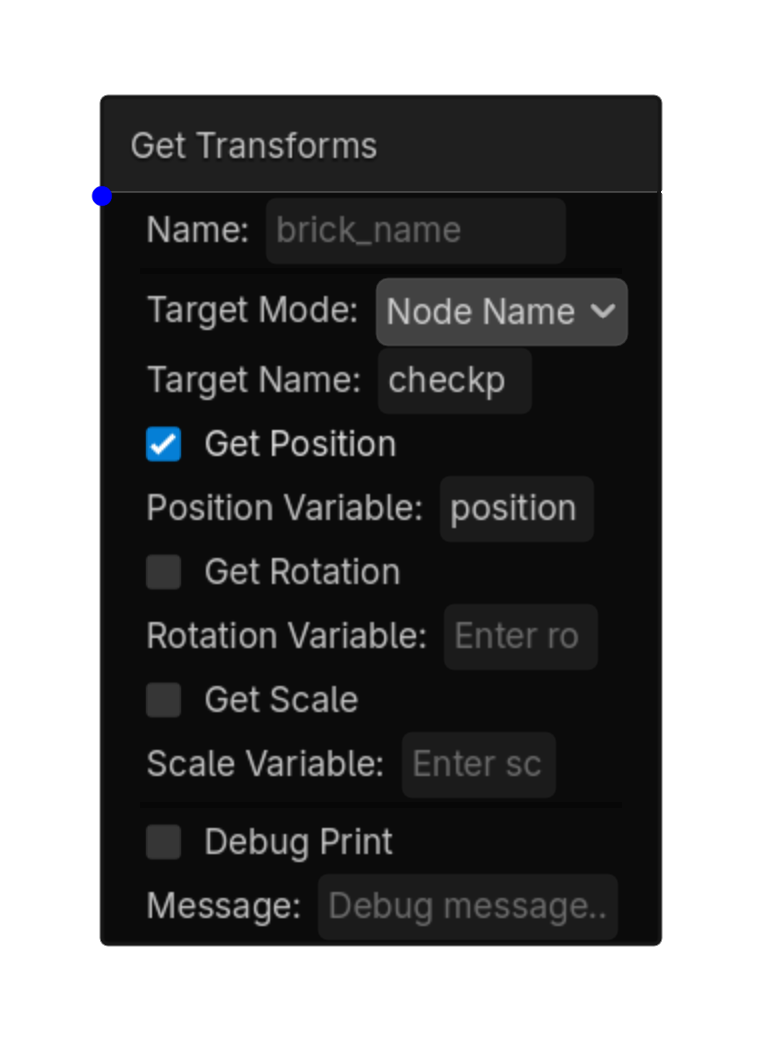
Gets position, rotation, and scale from a node or the nearest member of a group and stores the values as variables.

Menu Add Logic Brick → Actuators → Object
Source actuators/common/get_transforms_actuator.gd

Options

Property Details
target_mode Target Mode
Choices: Node Name,Group
Default: node_name
target_name Target Name
Node or group name
get_position Get Position
Default: true
position_variable Position Variable
get_rotation Get Rotation
Default: false
rotation_variable Rotation Variable
get_scale Get Scale
Default: false
scale_variable Scale Variable
Using this brick

Typical uses

  • Perform the object action described above after a sensor/controller chain succeeds.
  • Reuse the brick in multiple states or chains with different option values.
  • Pair it with an appropriate sensor to control when the action occurs.

Example chain

Choose a sensor Controller Get Transforms
Tip Test the actuator with the simplest possible sensor first, then add variables, timing, or additional conditions.
Common mistake A continuously active sensor may run this actuator every frame. Use a one-shot condition when the action should happen only once.
Get Transforms screenshot placeholder
Get Transforms screenshot
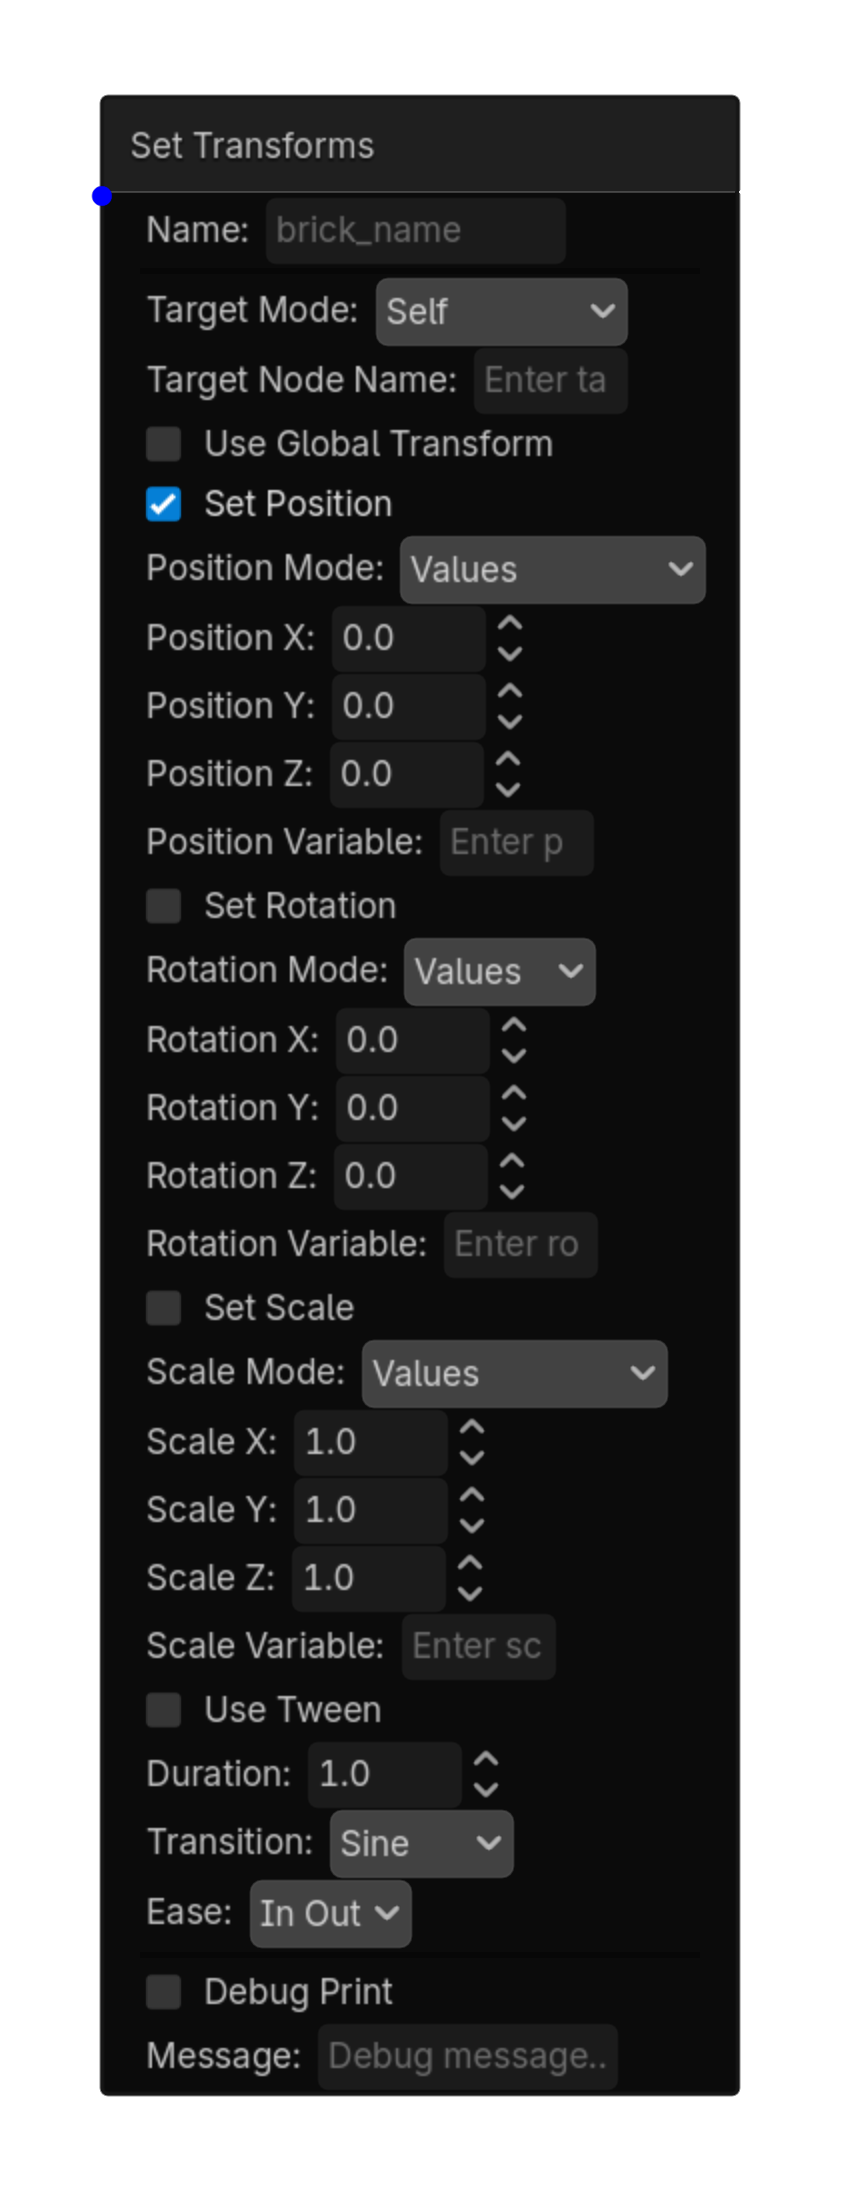
actuator • shared

Set Transforms

2D

Sets position, rotation, and scale from entered values or variables, instantly or over time.

Menu Add Logic Brick → Actuators → Object
Source actuators/common/scale_actuator.gd

This brick exposes no configurable properties.
Using this brick

Typical uses

  • Perform the object action described above after a sensor/controller chain succeeds.
  • Reuse the brick in multiple states or chains with different option values.
  • Pair it with an appropriate sensor to control when the action occurs.

Example chain

Choose a sensor Controller Set Transforms
Tip Test the actuator with the simplest possible sensor first, then add variables, timing, or additional conditions.
Common mistake A continuously active sensor may run this actuator every frame. Use a one-shot condition when the action should happen only once.
Set Transforms screenshot placeholder
Set Transforms screenshot
actuator • 2d

Property

2D

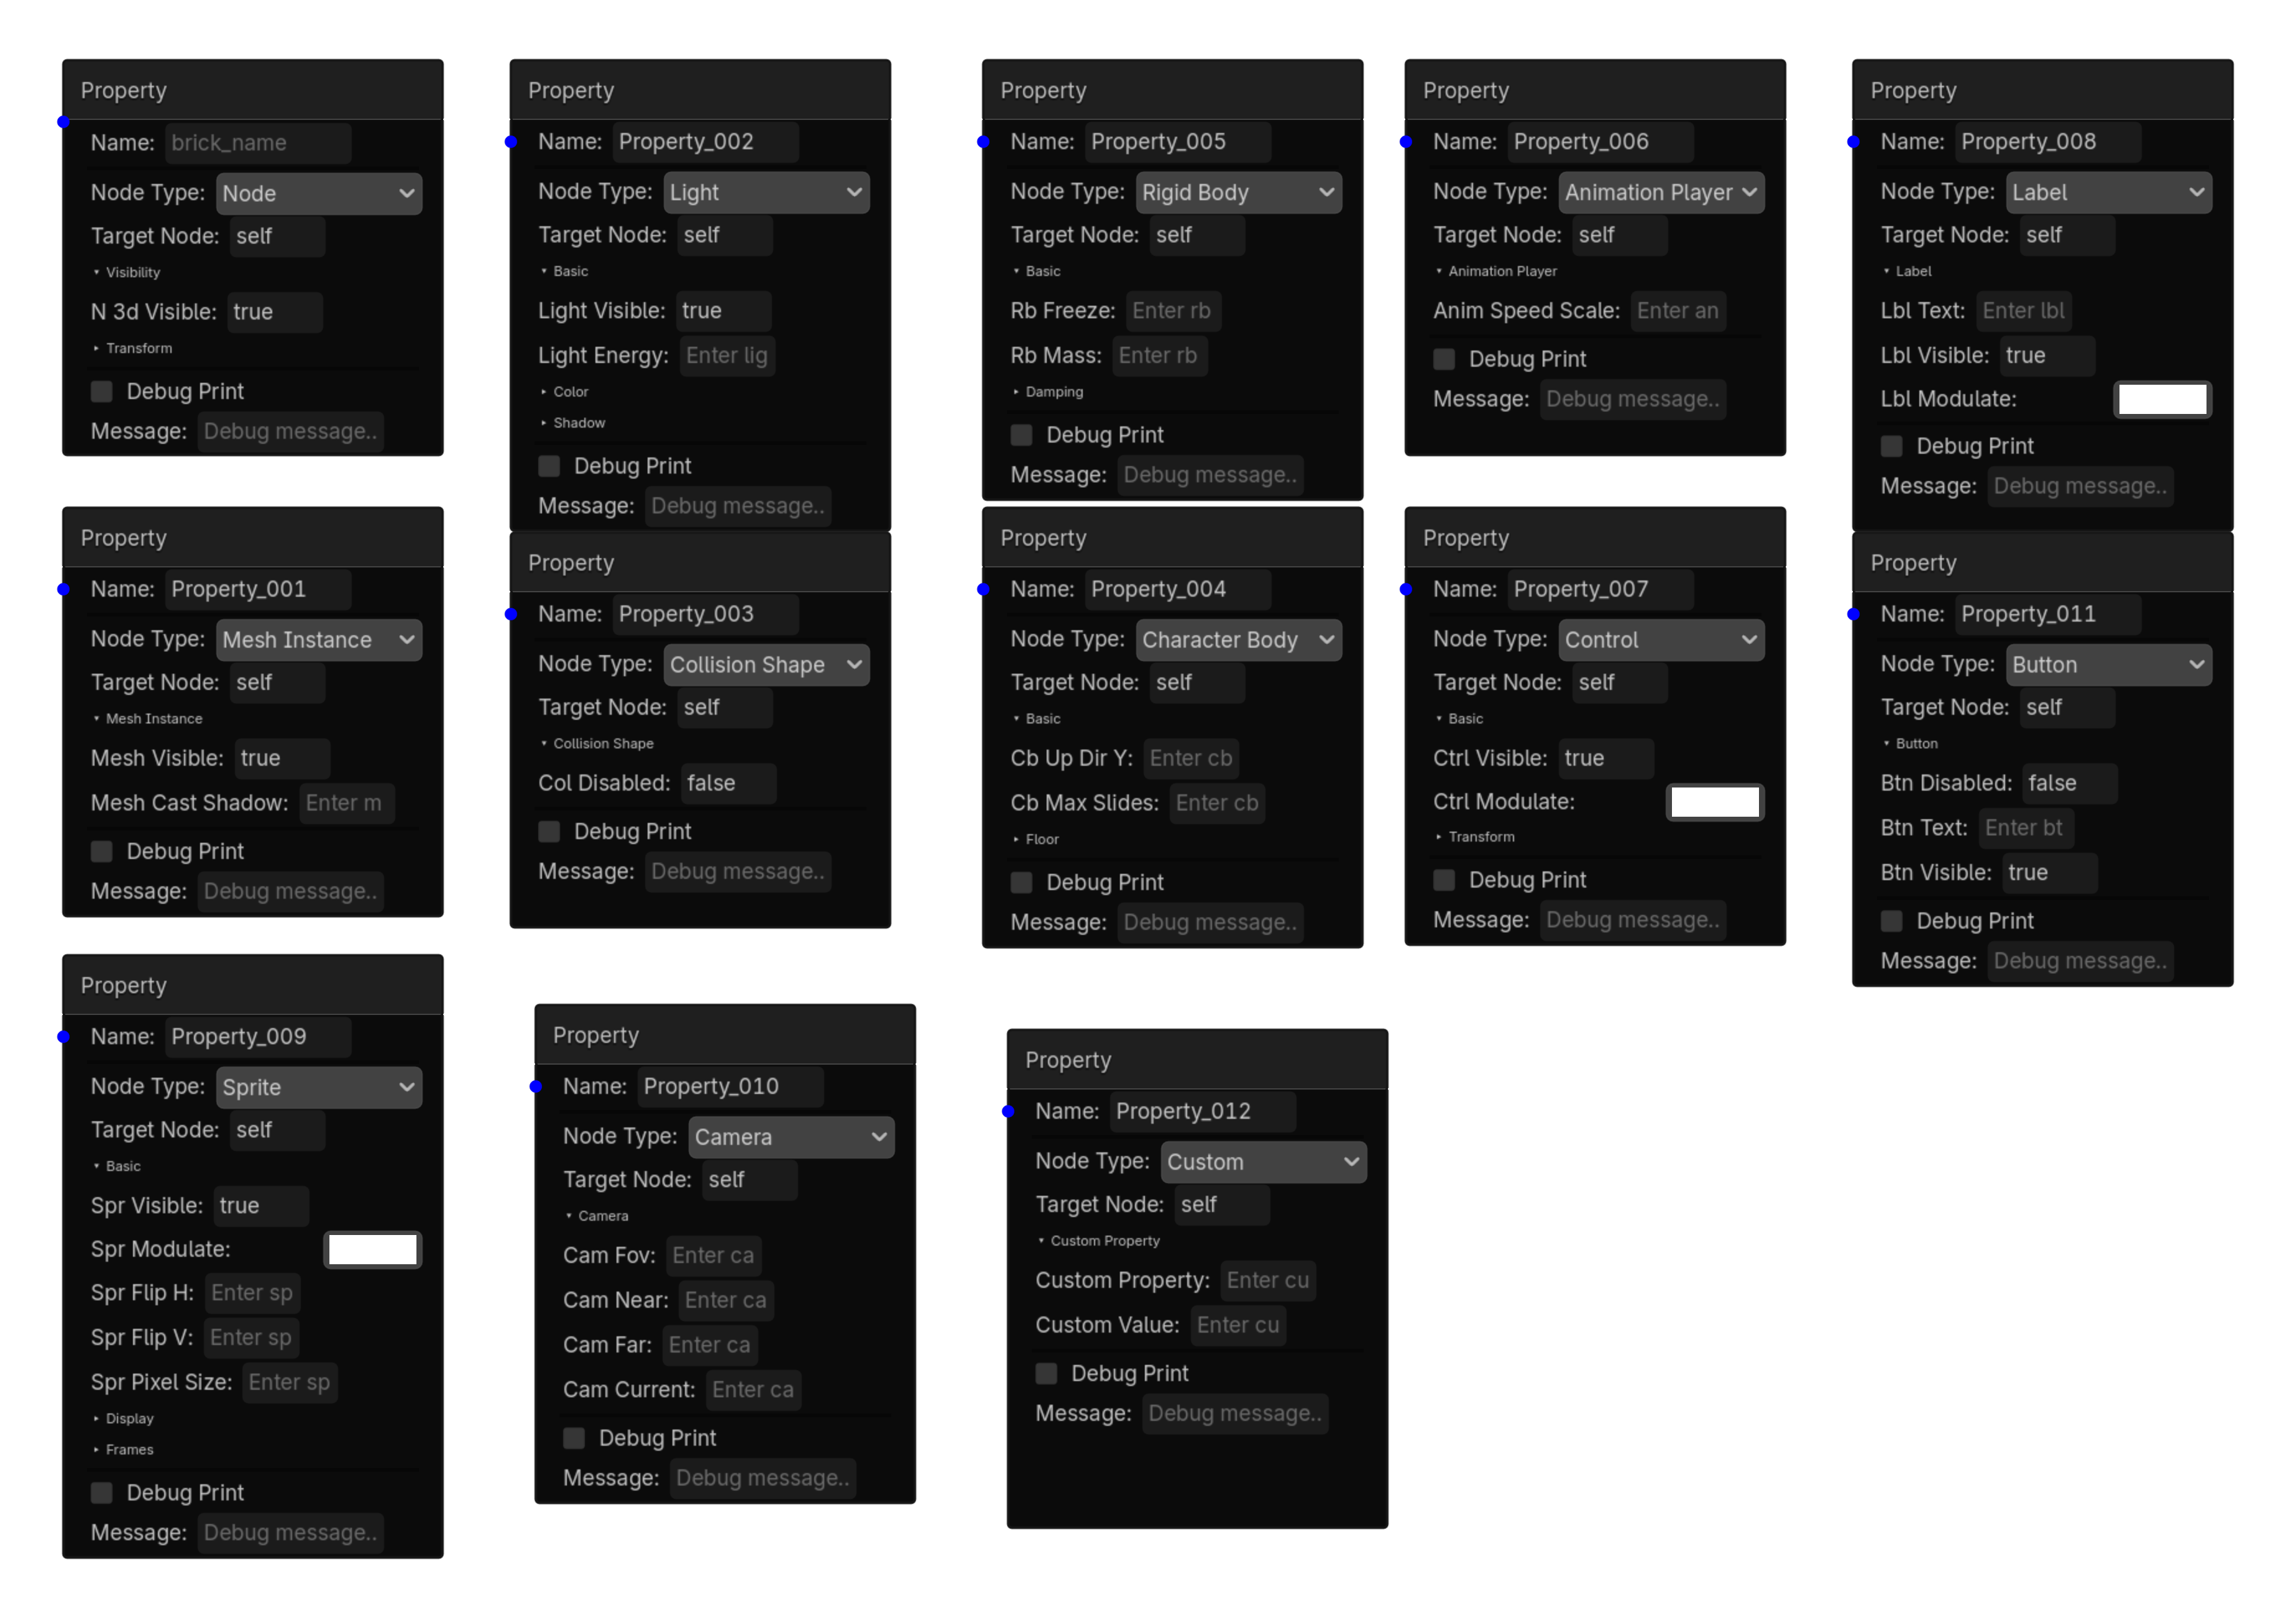
Sets properties on a target node.\nChoose the node type to see its available properties.\nLeave a field empty to skip setting that property.\n⚠ Adds @export in Inspector — assign the target node.

Menu Add Logic Brick → Actuators → Object
Source actuators/common/property_actuator.gd

Options

Property Details
node_type Node Type
Choices: Node,Mesh Instance,Collision Shape,Light,Rigid Body,Character Body,Animation Player,Control,Label,Button,Camera,Sprite,Custom
Default: Node
target_node Target Node
Default: self
_group_n3d_visibility Group N3D Visibility
Choices: Visibility
n3d_visible N3D Visible
Default: true
_group_n3d_transform Group N3D Transform
Choices: Transform
n3d_pos_x N3D Pos X
n3d_pos_y N3D Pos Y
n3d_pos_z N3D Pos Z
n3d_rot_x N3D Rot X
n3d_rot_y N3D Rot Y
n3d_rot_z N3D Rot Z
n3d_scale_x N3D Scale X
n3d_scale_y N3D Scale Y
n3d_scale_z N3D Scale Z
_group_mesh_basic Group Mesh Basic
Choices: Mesh Instance
mesh_visible Mesh Visible
Default: true
mesh_cast_shadow Mesh Cast Shadow
_group_col_basic Group Col Basic
Choices: Collision Shape
col_disabled Col Disabled
Default: false
_group_light_basic Group Light Basic
Choices: Basic
light_visible Light Visible
Default: true
light_energy Light Energy
_group_light_color Group Light Color
Choices: Color
light_color Light Color
Default: Color(1
_group_light_shadow Group Light Shadow
Choices: Shadow
light_shadow Light Shadow
_group_rb_basic Group Rb Basic
Choices: Basic
rb_freeze Rb Freeze
rb_mass Rb Mass
_group_rb_damping Group Rb Damping
Choices: Damping
rb_gravity_scale Rb Gravity Scale
rb_linear_damp Rb Linear Damp
rb_angular_damp Rb Angular Damp
_group_cb_basic Group Cb Basic
Choices: Basic
cb_up_dir_y Cb Up Dir Y
cb_max_slides Cb Max Slides
_group_cb_floor Group Cb Floor
Choices: Floor
cb_floor_max_angle Cb Floor Max Angle
cb_stop_on_slope Cb Stop On Slope
cb_block_on_wall Cb Block On Wall
cb_slide_on_ceiling Cb Slide On Ceiling
_group_anim_basic Group Anim Basic
Choices: Animation Player
anim_speed_scale Anim Speed Scale
_group_ctrl_basic Group Ctrl Basic
Choices: Basic
ctrl_visible Ctrl Visible
Default: true
ctrl_modulate Ctrl Modulate
Default: Color(1
_group_ctrl_transform Group Ctrl Transform
Choices: Transform
ctrl_size_x Ctrl Size X
ctrl_size_y Ctrl Size Y
ctrl_pos_x Ctrl Pos X
ctrl_pos_y Ctrl Pos Y
ctrl_rotation Ctrl Rotation
ctrl_scale_x Ctrl Scale X
ctrl_scale_y Ctrl Scale Y
_group_lbl_basic Group Lbl Basic
Choices: Label
lbl_text Lbl Text
lbl_visible Lbl Visible
Default: true
lbl_modulate Lbl Modulate
Default: Color(1
_group_btn_basic Group Btn Basic
Choices: Button
btn_disabled Btn Disabled
Default: false
btn_text Btn Text
btn_visible Btn Visible
Default: true
_group_cam_basic Group Cam Basic
Choices: Camera
cam_fov Cam Fov
cam_near Cam Near
cam_far Cam Far
cam_current Cam Current
_group_spr_basic Group Spr Basic
Choices: Basic
spr_visible Spr Visible
Default: true
spr_modulate Spr Modulate
Default: Color(1
spr_flip_h Spr Flip H
spr_flip_v Spr Flip V
spr_pixel_size Spr Pixel Size
_group_spr_display Group Spr Display
Choices: Display
spr_billboard Spr Billboard
spr_transparent Spr Transparent
spr_shaded Spr Shaded
spr_double_sided Spr Double Sided
_group_spr_frames Group Spr Frames
Choices: Frames
spr_frame Spr Frame
spr_hframes Spr Hframes
spr_vframes Spr Vframes
_group_custom Group Custom
Choices: Custom Property
custom_property Custom Property
custom_value Custom Value
Using this brick

Typical uses

  • Perform the general action described above after a sensor/controller chain succeeds.
  • Reuse the brick in multiple states or chains with different option values.
  • Target a specific node by configuring the node field before testing the chain.

Example chain

Choose a sensor Controller Property
Tip Confirm the target node name and node type before troubleshooting the rest of the chain.
Common mistake A continuously active sensor may run this actuator every frame. Use a one-shot condition when the action should happen only once.
Property screenshot placeholder
Property screenshot
actuator • shared

Visibility

2D

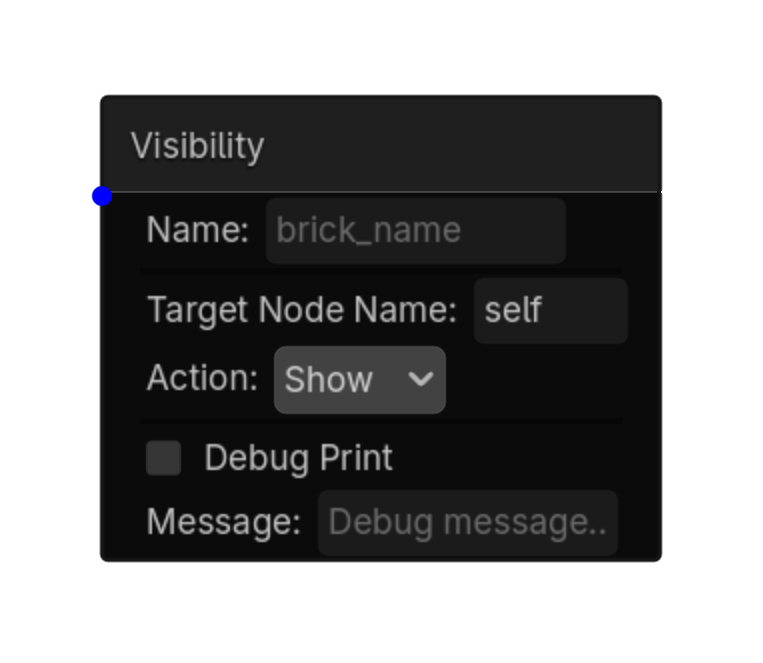
Shows, hides, or toggles visibility of a node by name. Uses the same current-scene recursive name lookup as the Text Actuator.

Menu Add Logic Brick → Actuators → Object
Source actuators/common/visibility_actuator.gd

Options

Property Details
target_node_name Target Node Name
Default: self
Node name
action Action
Choices: Show,Hide,Toggle
Default: show
Using this brick

Typical uses

  • Perform the general action described above after a sensor/controller chain succeeds.
  • Reuse the brick in multiple states or chains with different option values.
  • Target a specific node by configuring the node field before testing the chain.

Example chain

Choose a sensor Controller Visibility
Tip Confirm the target node name and node type before troubleshooting the rest of the chain.
Common mistake A continuously active sensor may run this actuator every frame. Use a one-shot condition when the action should happen only once.
Visibility screenshot placeholder
Visibility screenshot
RIGHT-CLICK SUBMENU

Physics

Right-click → Actuators → Physics

actuator • 2d

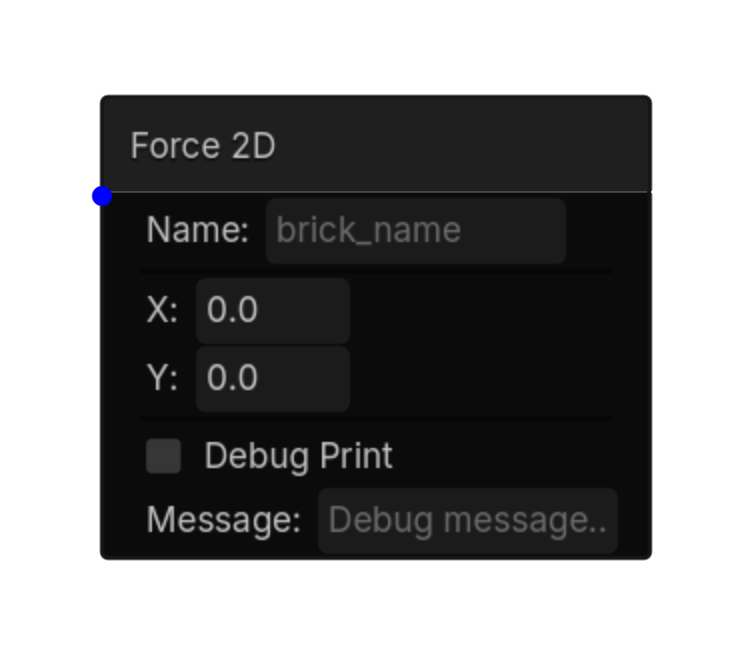
Force 2D

2D

Force 2D logic brick.

Menu Add Logic Brick → Actuators → Physics
Source actuators/2d/force_2d_actuator.gd

This brick exposes no configurable properties.
Using this brick

Typical uses

  • Perform the general action described above after a sensor/controller chain succeeds.
  • Reuse the brick in multiple states or chains with different option values.
  • Pair it with an appropriate sensor to control when the action occurs.

Example chain

Choose a sensor Controller Force 2D
Tip Test the actuator with the simplest possible sensor first, then add variables, timing, or additional conditions.
Common mistake A continuously active sensor may run this actuator every frame. Use a one-shot condition when the action should happen only once.
Force 2D screenshot placeholder
Force 2D screenshot
actuator • 2d

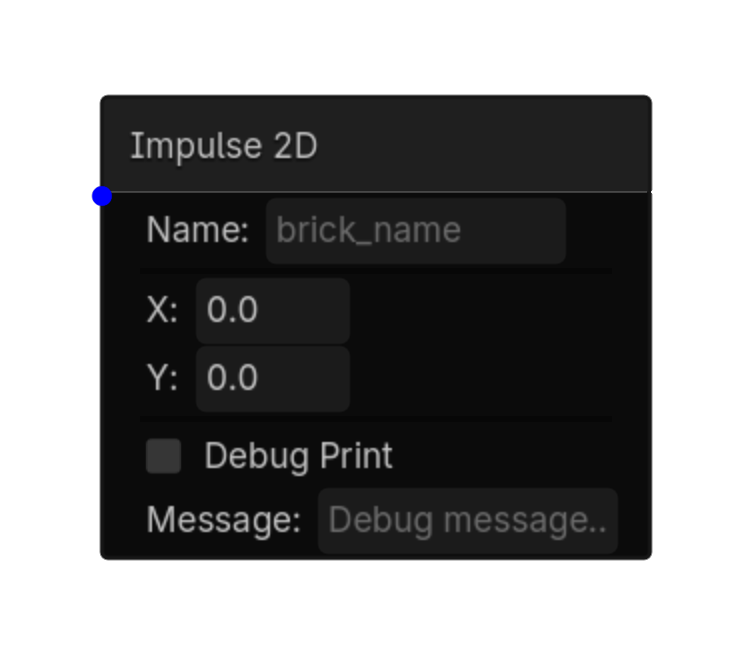
Impulse 2D

2D

Impulse 2D logic brick.

Menu Add Logic Brick → Actuators → Physics
Source actuators/2d/impulse_2d_actuator.gd

This brick exposes no configurable properties.
Using this brick

Typical uses

  • Perform the general action described above after a sensor/controller chain succeeds.
  • Reuse the brick in multiple states or chains with different option values.
  • Pair it with an appropriate sensor to control when the action occurs.

Example chain

Choose a sensor Controller Impulse 2D
Tip Test the actuator with the simplest possible sensor first, then add variables, timing, or additional conditions.
Common mistake A continuously active sensor may run this actuator every frame. Use a one-shot condition when the action should happen only once.
Impulse 2D screenshot placeholder
Impulse 2D screenshot
actuator • 2d

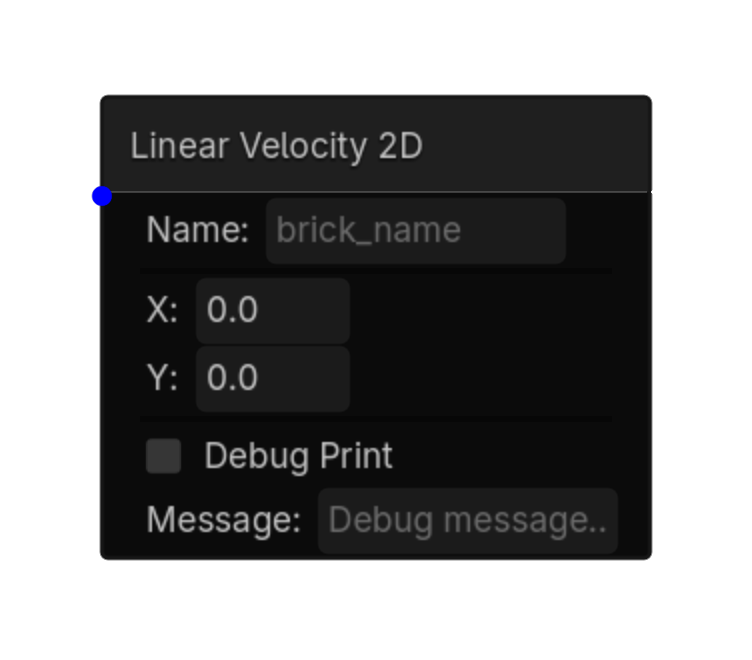
Linear Velocity 2D

2D

Linear Velocity 2D logic brick.

Menu Add Logic Brick → Actuators → Physics
Source actuators/2d/linear_velocity_2d_actuator.gd

This brick exposes no configurable properties.
Using this brick

Typical uses

  • Perform the general action described above after a sensor/controller chain succeeds.
  • Reuse the brick in multiple states or chains with different option values.
  • Pair it with an appropriate sensor to control when the action occurs.

Example chain

Choose a sensor Controller Linear Velocity 2D
Tip Test the actuator with the simplest possible sensor first, then add variables, timing, or additional conditions.
Common mistake A continuously active sensor may run this actuator every frame. Use a one-shot condition when the action should happen only once.
Linear Velocity 2D screenshot placeholder
Linear Velocity 2D screenshot
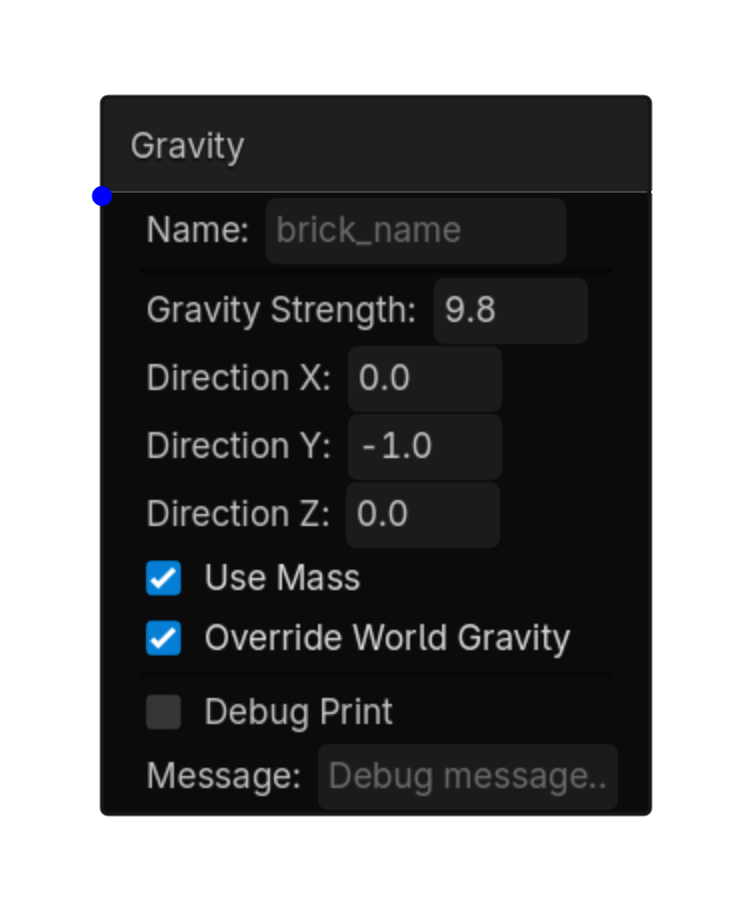
actuator • 2d

Gravity

2D

Applies directional gravity to a RigidBody2D using the project gravity as a strength multiplier.

MenuAdd Logic Brick → Actuators → Physics
Sourceactuators/2d/gravity_2d_actuator.gd

Options

PropertyDetails
strengthGravity multiplier: 1 is project gravity, 2 is double, and 0.5 is half.
direction_x / direction_y2D gravity direction. Positive Y points down in Godot.
use_massScale force by the RigidBody2D mass.
override_world_gravityDisable the body’s normal project-gravity contribution.
reset_velocity_on_direction_changeClear existing momentum when the gravity direction changes.
Using this brick

Typical uses

  • Run Gravity after a sensor and controller chain succeeds.
  • Combine it with states to enable the behavior only during the appropriate gameplay mode.

Example chain

SensorControllerGravity
TipFor upward gravity, use X = 0 and Y = -1.
Common mistakeStrength is a multiplier, not a raw pixel acceleration. A value of 10 means ten times project gravity.
Gravity actuator screenshot
Gravity screenshot
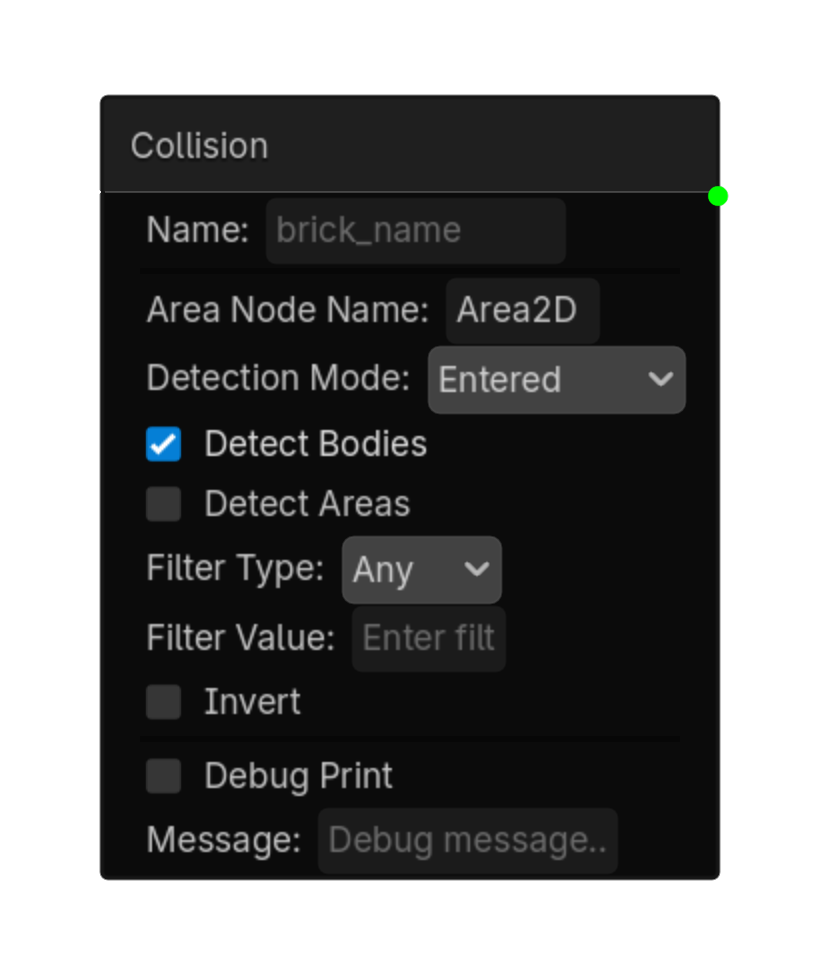
actuator • 2d

Collisions

2D

Enables or disables 2D collision shapes, collision layer or mask bits, and Area2D monitoring.

MenuAdd Logic Brick → Actuators → Physics
Sourceactuators/2d/collision_2d_actuator.gd

Options

PropertyDetails
actionDisable Shape, Enable Shape, Set Layer Bit, Set Mask Bit, Enable Monitoring, or Disable Monitoring.
target_nodeCollisionShape2D, CollisionPolygon2D, CollisionObject2D, or Area2D target.
layer_valueCollision layer or mask bit from 1 through 32.
bit_enabledWhether the selected layer or mask bit is enabled.
Using this brick

Typical uses

  • Run Collisions after a sensor and controller chain succeeds.
  • Combine it with states to enable the behavior only during the appropriate gameplay mode.

Example chain

SensorControllerCollisions
TipUse deferred collision-shape changes when toggling during a physics callback; the actuator handles shape changes safely.
Common mistakeCollision layers and masks are one-based in the brick UI but converted to Godot’s zero-based bit index internally.
Collisions actuator screenshot
Collisions screenshot
RIGHT-CLICK SUBMENU

UI

Right-click → Actuators → UI

actuator • shared

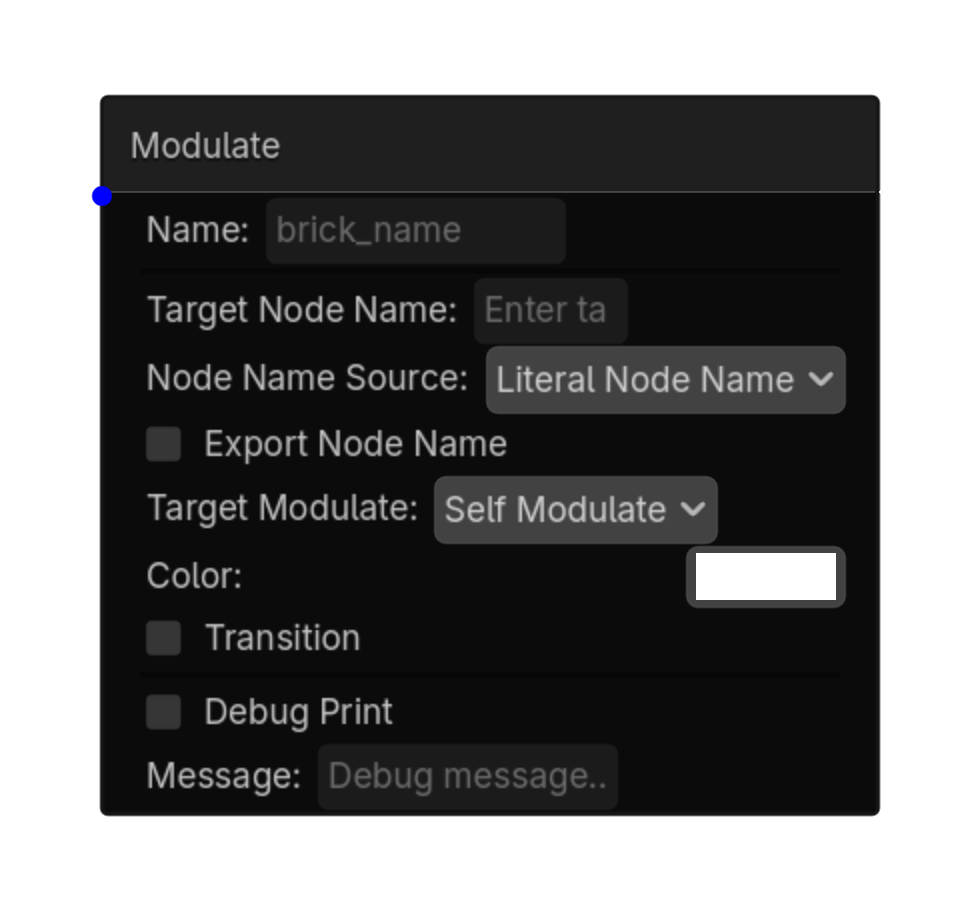
Modulate

2D

Sets or smoothly transitions the color/alpha of a UI or 2D node found by name anywhere in the current scene tree.

Menu Add Logic Brick → Actuators → UI
Source actuators/common/modulate_actuator.gd

Options

Property Details
target_node_name Target Node Name
node_name_source Node Name Source
Choices: Literal Node Name,String Variable
Default: literal
export_node_name Export Node Name
Default: false
target_modulate Target Modulate
Choices: Self Modulate,Modulate
Default: self_modulate
color Color
Default: Color(1
transition Transition
Default: false
transition_speed Transition Speed
Default: 5.0
Using this brick

Typical uses

  • Perform the general action described above after a sensor/controller chain succeeds.
  • Reuse the brick in multiple states or chains with different option values.
  • Target a specific node by configuring the node field before testing the chain.

Example chain

Choose a sensor Controller Modulate
Tip Confirm the target node name and node type before troubleshooting the rest of the chain.
Common mistake Timing options change how long the action takes; avoid retriggering the same transition every frame unless that behavior is intentional.
Modulate screenshot placeholder
Modulate screenshot
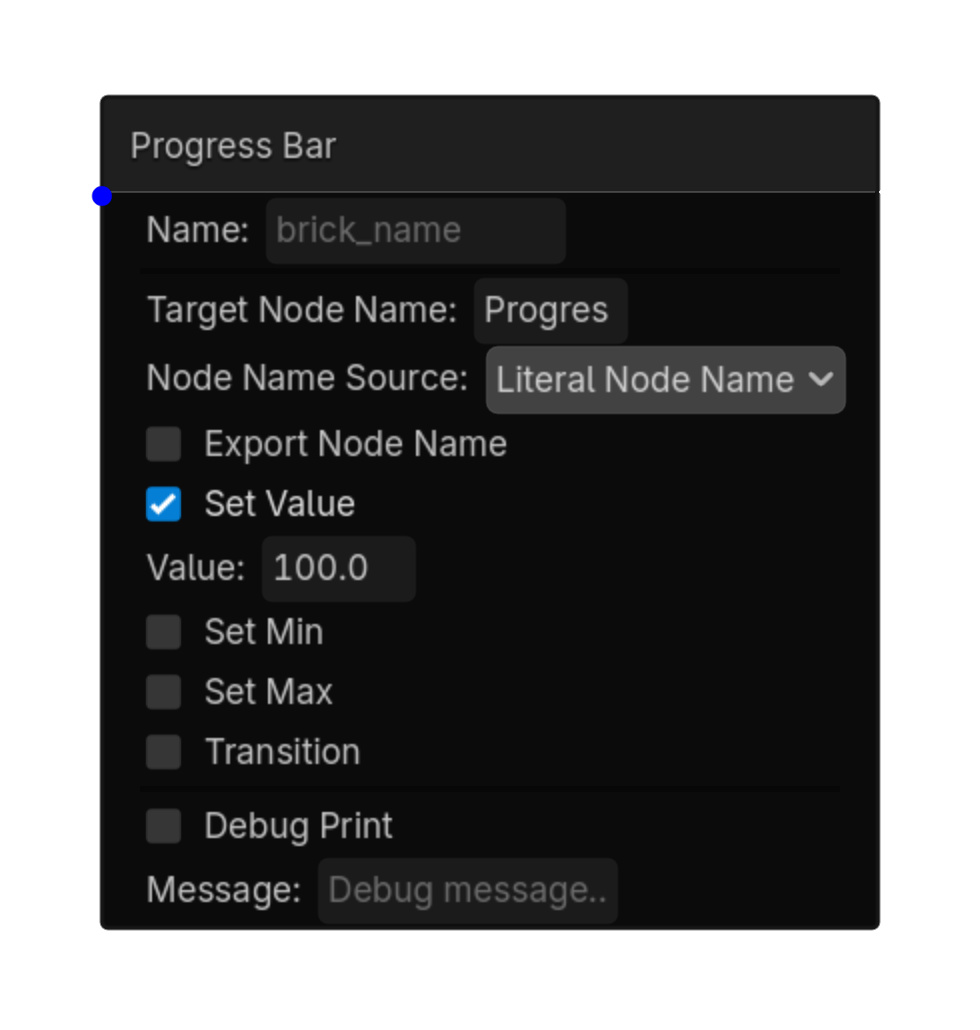
actuator • 2d

Progress Bar

2D

Sets or smoothly updates the value, minimum, or maximum of a ProgressBar, Slider, or other Range node.

MenuAdd Logic Brick → Actuators → Ui
Sourceactuators/2d/progress_bar_2d_actuator.gd

Options

PropertyDetails
target_node_nameTarget ProgressBar, Slider, or Range node.
node_name_sourceLiteral Node Name or String Variable.
set_value / valueEnable and provide the new value.
set_min / min_valueEnable and provide a new minimum.
set_max / max_valueEnable and provide a new maximum.
transition / transition_speedSmoothly approach the requested value instead of changing instantly.
Using this brick

Typical uses

  • Run Progress Bar after a sensor and controller chain succeeds.
  • Combine it with states to enable the behavior only during the appropriate gameplay mode.

Example chain

SensorControllerProgress Bar
TipValues can reference variables, making this useful for health, stamina, loading, and score meters.
Common mistakeThe target must inherit Range; a plain Control node does not have value, min_value, or max_value properties.
Progress Bar actuator screenshot
Progress Bar screenshot
actuator • 2d

Text

2D

Updates a Label, RichTextLabel, or compatible text UI node from a variable or static string.

MenuAdd Logic Brick → Actuators → Ui
Sourceactuators/2d/text_2d_actuator.gd

Options

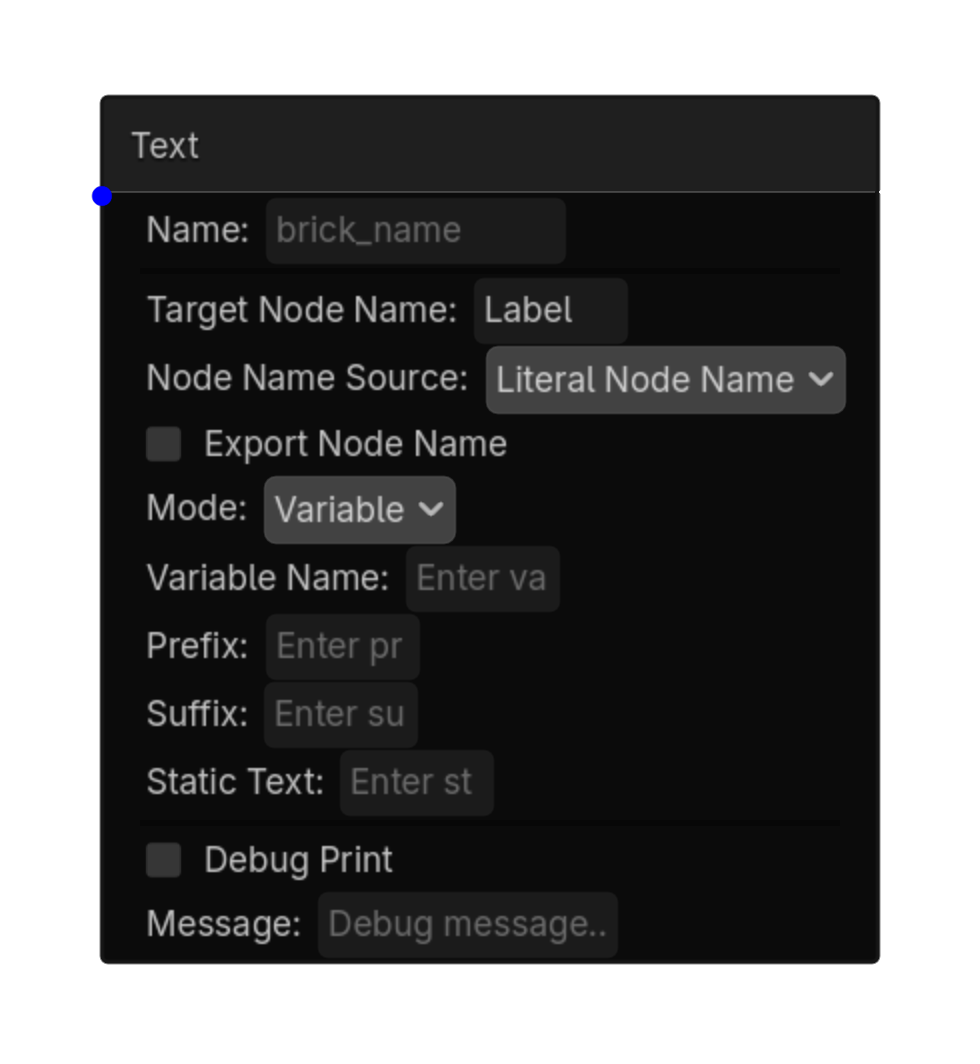
PropertyDetails
target_node_nameTarget text node.
node_name_sourceLiteral Node Name or String Variable.
modeVariable or Static.
variable_nameVariable converted to text in Variable mode.
prefix / suffixText placed before or after the variable value.
static_textExact text used in Static mode.
Using this brick

Typical uses

  • Run Text after a sensor and controller chain succeeds.
  • Combine it with states to enable the behavior only during the appropriate gameplay mode.

Example chain

SensorControllerText
TipUse Prefix and Suffix for labels such as “Health: 75 / 100”.
Common mistakeVariable mode requires a valid variable name on the generated script or accessible target context.
Text actuator screenshot
Text screenshot
AVAILABLE IN THIS WORKFLOW

General

Actuators available in the 2D workflow.

actuator • 2d

Animation

2D

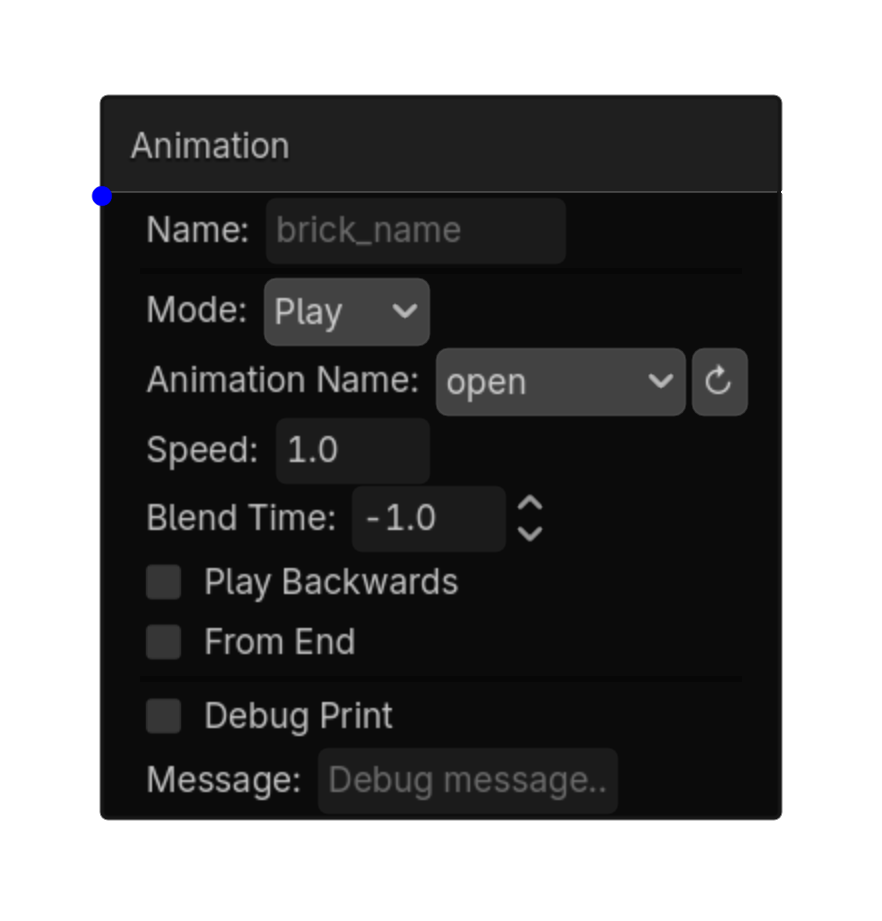
Play, stop, or control animations by name.\nAutomatically finds the AnimationPlayer that owns the animation.\nWorks with AnimationPlayers nested at any depth.

Menu Add Logic Brick → Actuators → General
Source actuators/common/animation_actuator.gd

Options

Property Details
mode Mode
Choices: Play,Stop,Pause,Queue
Default: play
animation_name Animation Name
Choices: __ANIMATION_LIST__
speed Speed
Default: 1.0
blend_time Blend Time
Default: -1.0
play_backwards Play Backwards
Default: false
from_end From End
Default: false
Using this brick

Typical uses

  • Perform the general action described above after a sensor/controller chain succeeds.
  • Reuse the brick in multiple states or chains with different option values.
  • Pair it with an appropriate sensor to control when the action occurs.

Example chain

Choose a sensor Controller Animation
Tip Test the actuator with the simplest possible sensor first, then add variables, timing, or additional conditions.
Common mistake A continuously active sensor may run this actuator every frame. Use a one-shot condition when the action should happen only once.
Animation screenshot placeholder
Animation screenshot
actuator • 2d

Tween

2D

Animates any property on self or on a node found by name anywhere in the current scene tree.

Menu Add Logic Brick → Actuators → General
Source actuators/common/tween_actuator.gd

Options

Property Details
target_mode Target Mode
Choices: Self,Node
Default: self
target_node_name Target Node Name
node_name_source Node Name Source
Choices: Literal Node Name,String Variable
Default: literal
export_node_name Export Node Name
Default: false
property Property
Default: modulate:a
target_value Target Value
Default: 0.0
duration Duration
Default: 0.5
trans_type Trans Type
Choices: Linear,Sine,Quint,Quart,Quad,Expo,Elastic,Bounce,Back,Spring,Circular,Cubic
Default: linear
ease_type Ease Type
Choices: In,Out,In Out,Out In
Default: in_out
loop Loop
Default: false
Using this brick

Typical uses

  • Perform the general action described above after a sensor/controller chain succeeds.
  • Reuse the brick in multiple states or chains with different option values.
  • Target a specific node by configuring the node field before testing the chain.

Example chain

Choose a sensor Controller Tween
Tip Confirm the target node name and node type before troubleshooting the rest of the chain.
Common mistake Timing options change how long the action takes; avoid retriggering the same transition every frame unless that behavior is intentional.
Tween screenshot placeholder
Tween screenshot